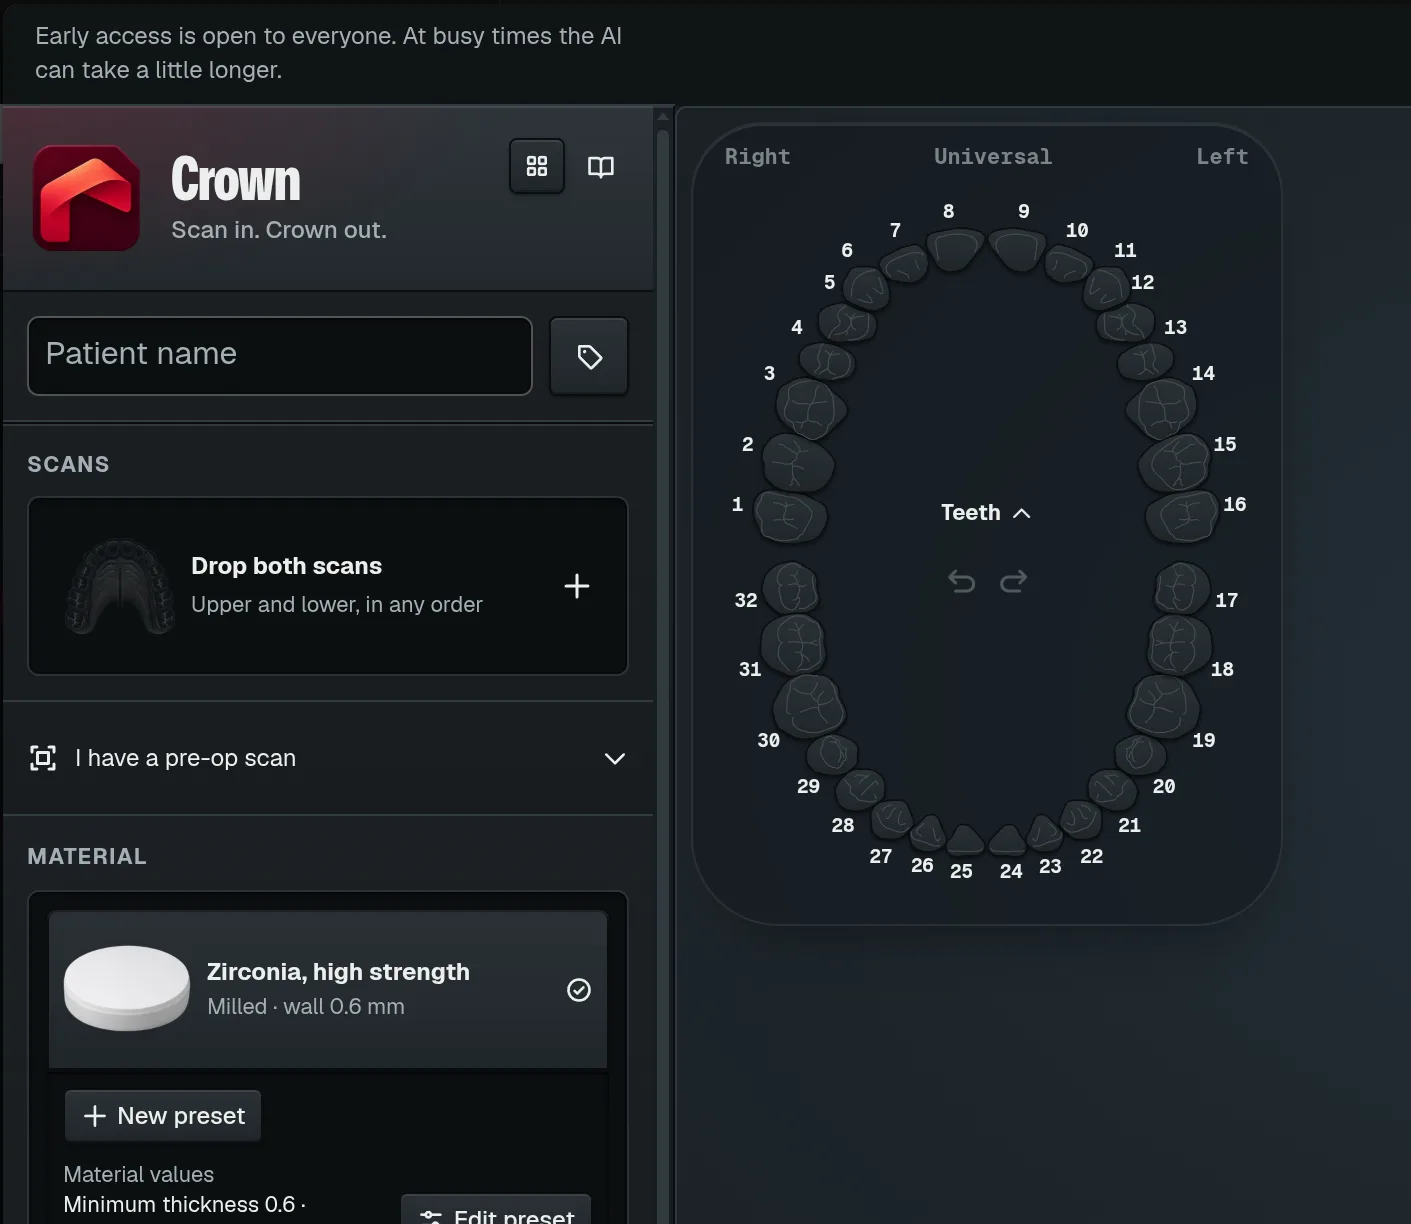
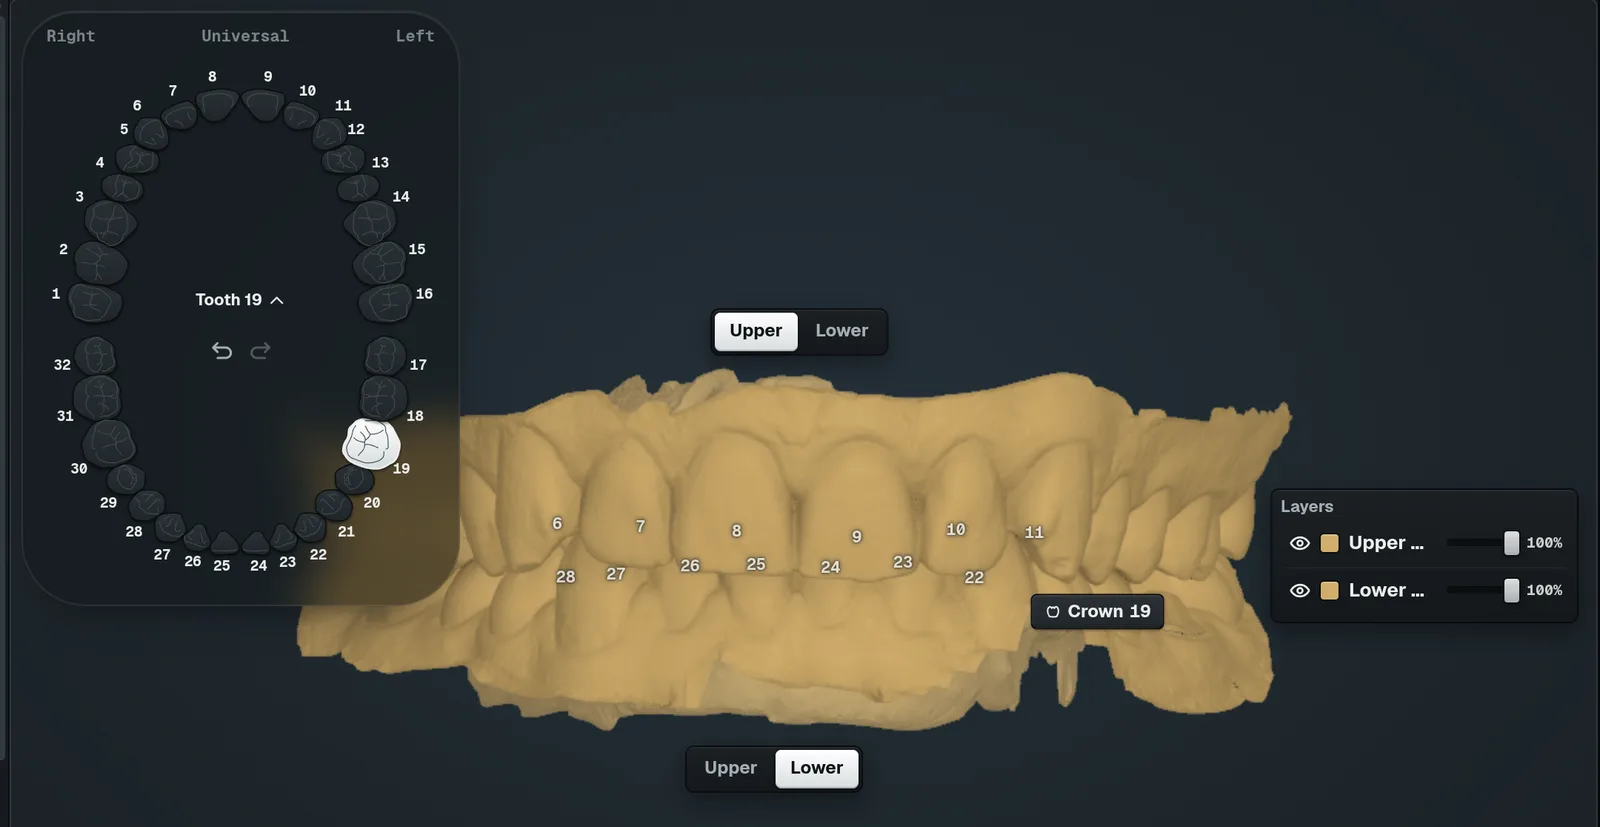
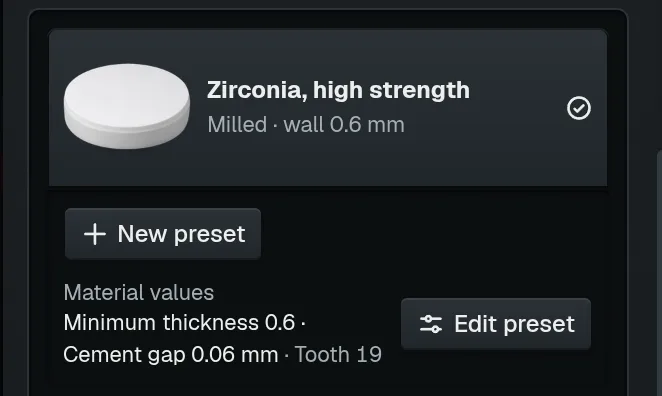
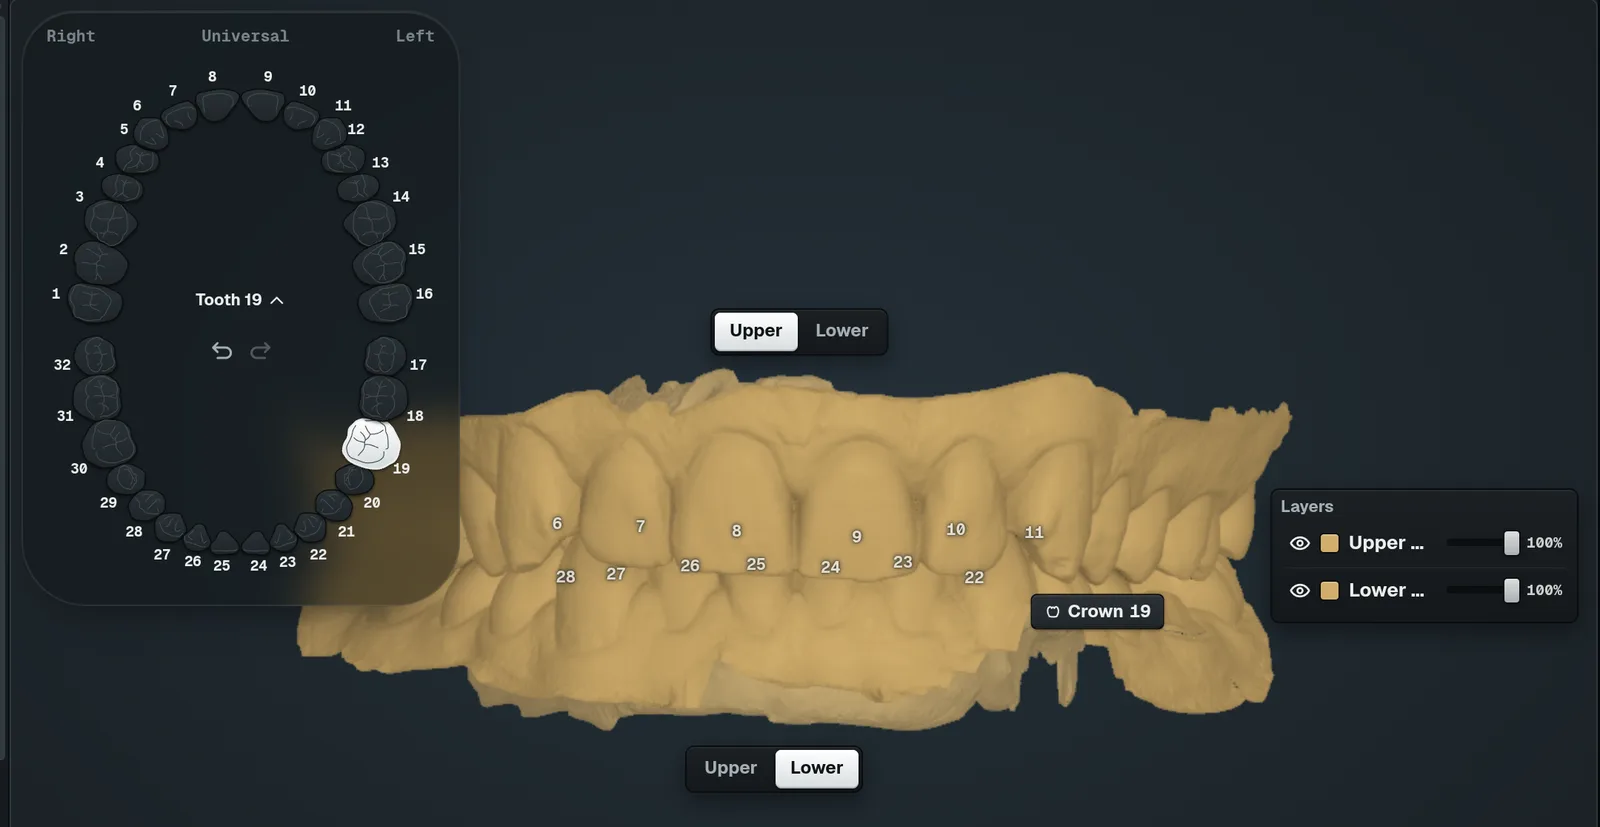
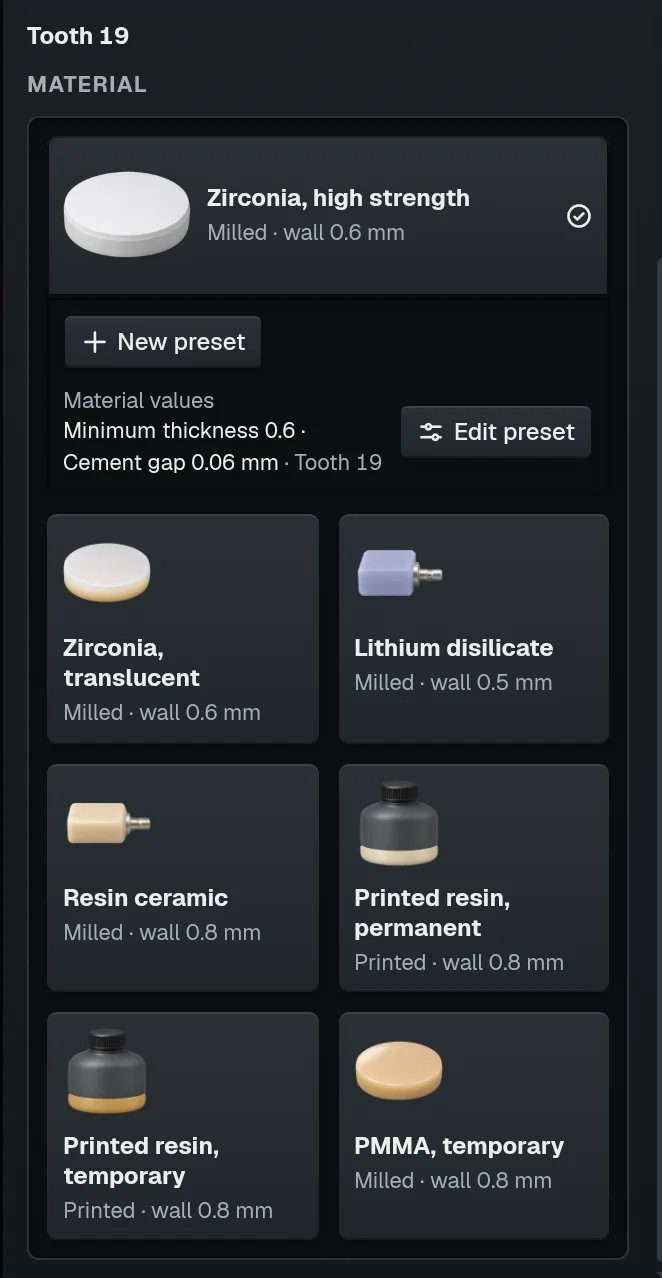
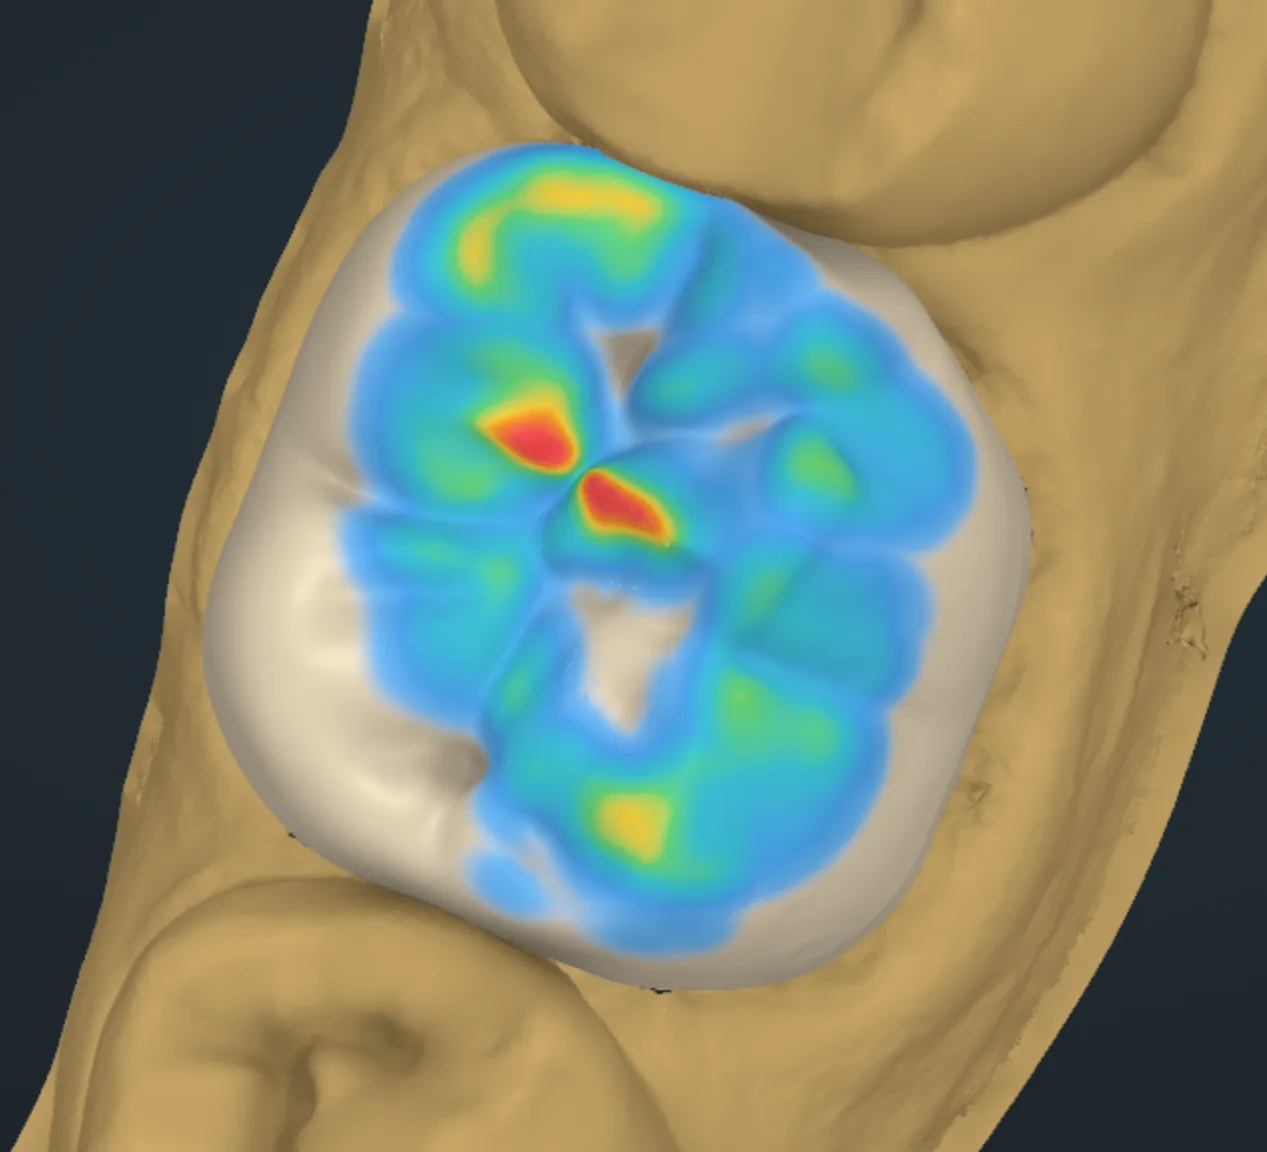
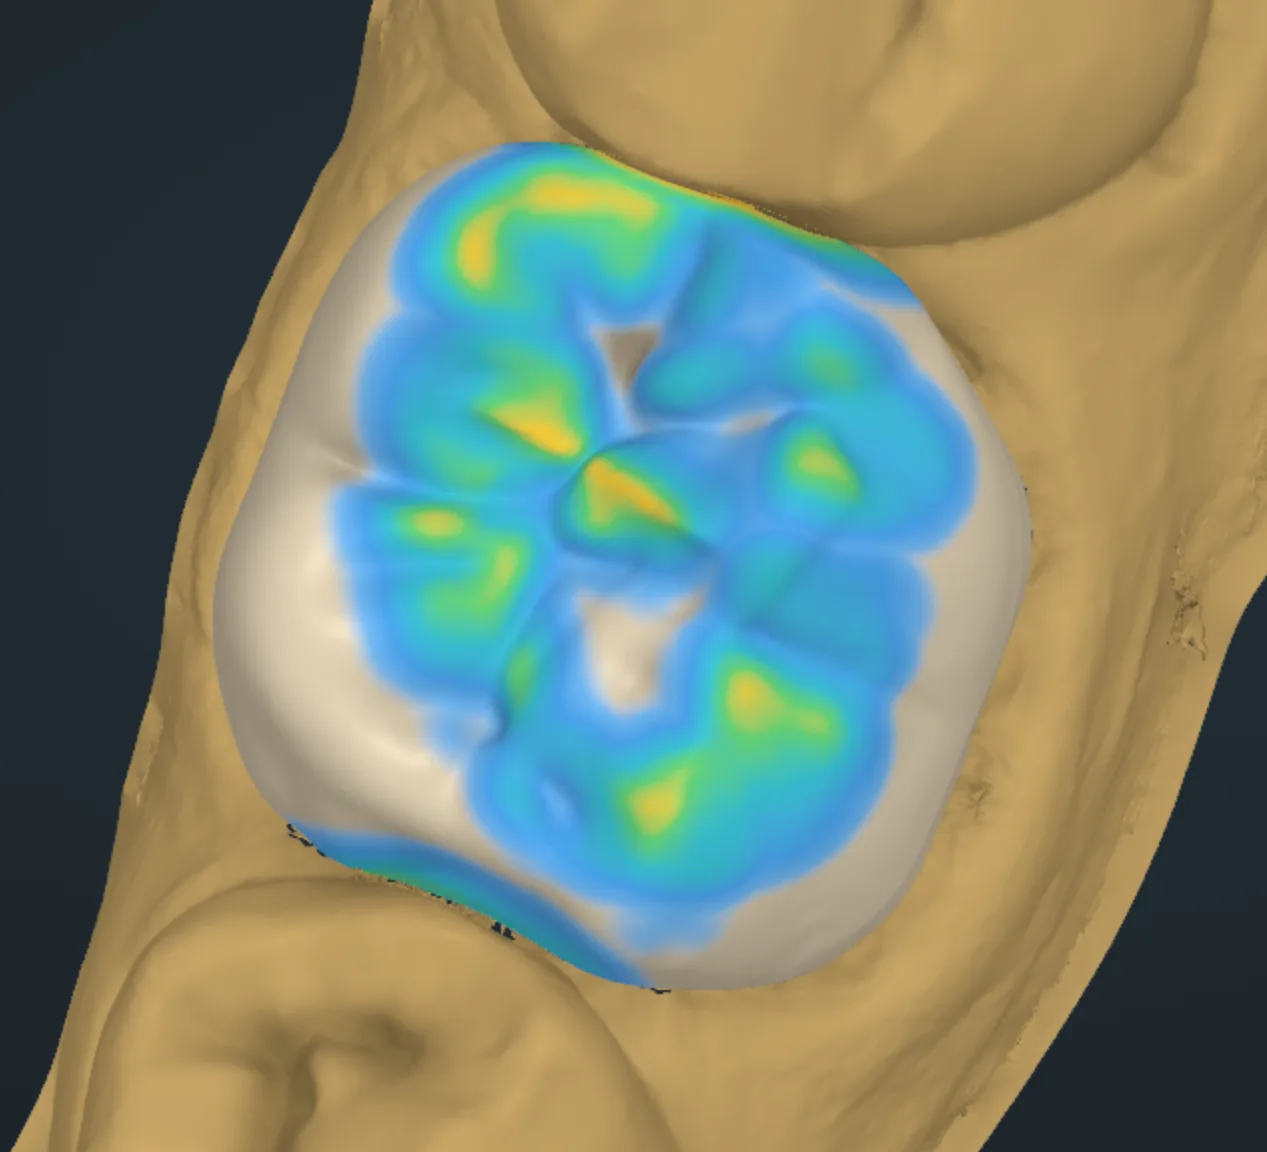
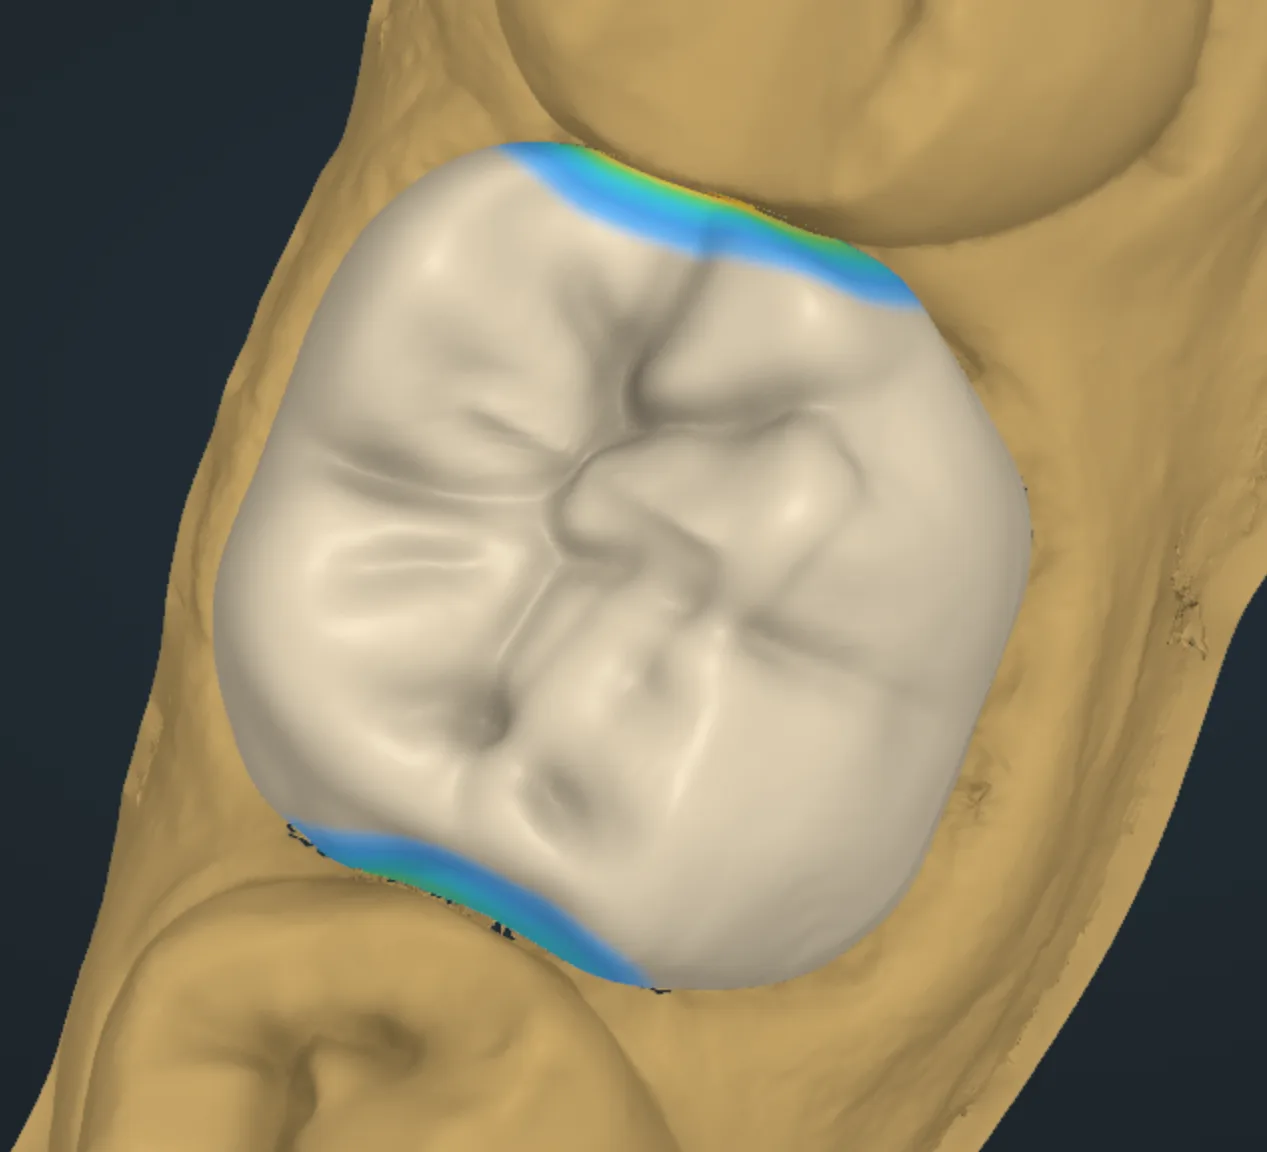
Each material tile carries its own presets: wall thickness and cement gap.
ABC
1
Click a material tile A.
The tile opens and shows its values: minimum thickness and cement gap.
2
To keep your own values, press New presetB.
3
To change the values, press Edit presetC.
4
Set the values, then press Save and apply.
Tip
Your last material and preset come back on the next order.
Have a scan from before preparation? Open I have a pre-op scan and drop it there.
More
Wall thickness and cement gap can still be changed in the case: Inner surface lessons.
Margin line
Check the margin line
https://occlutrace.ai/en/help/crown/margin
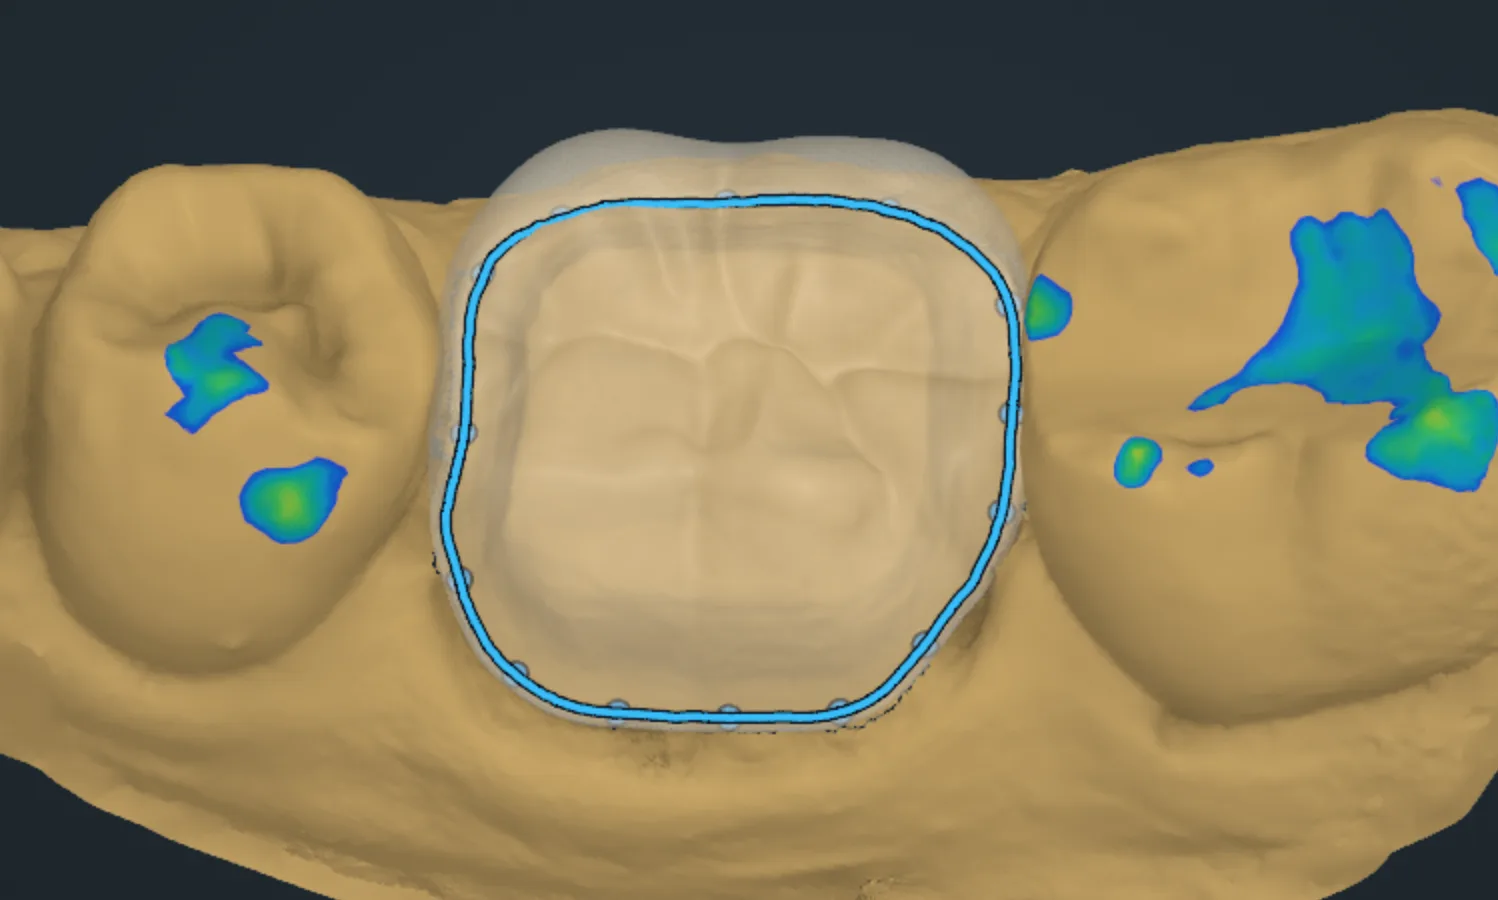
The line is found when the case opens. Check it all the way round.
1
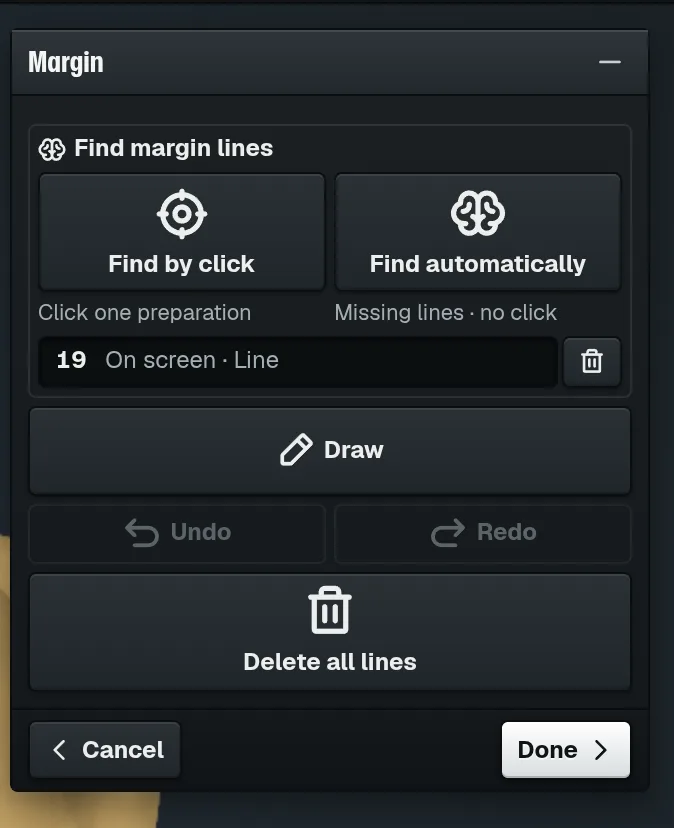
In the Crown window, press MarginA.
A
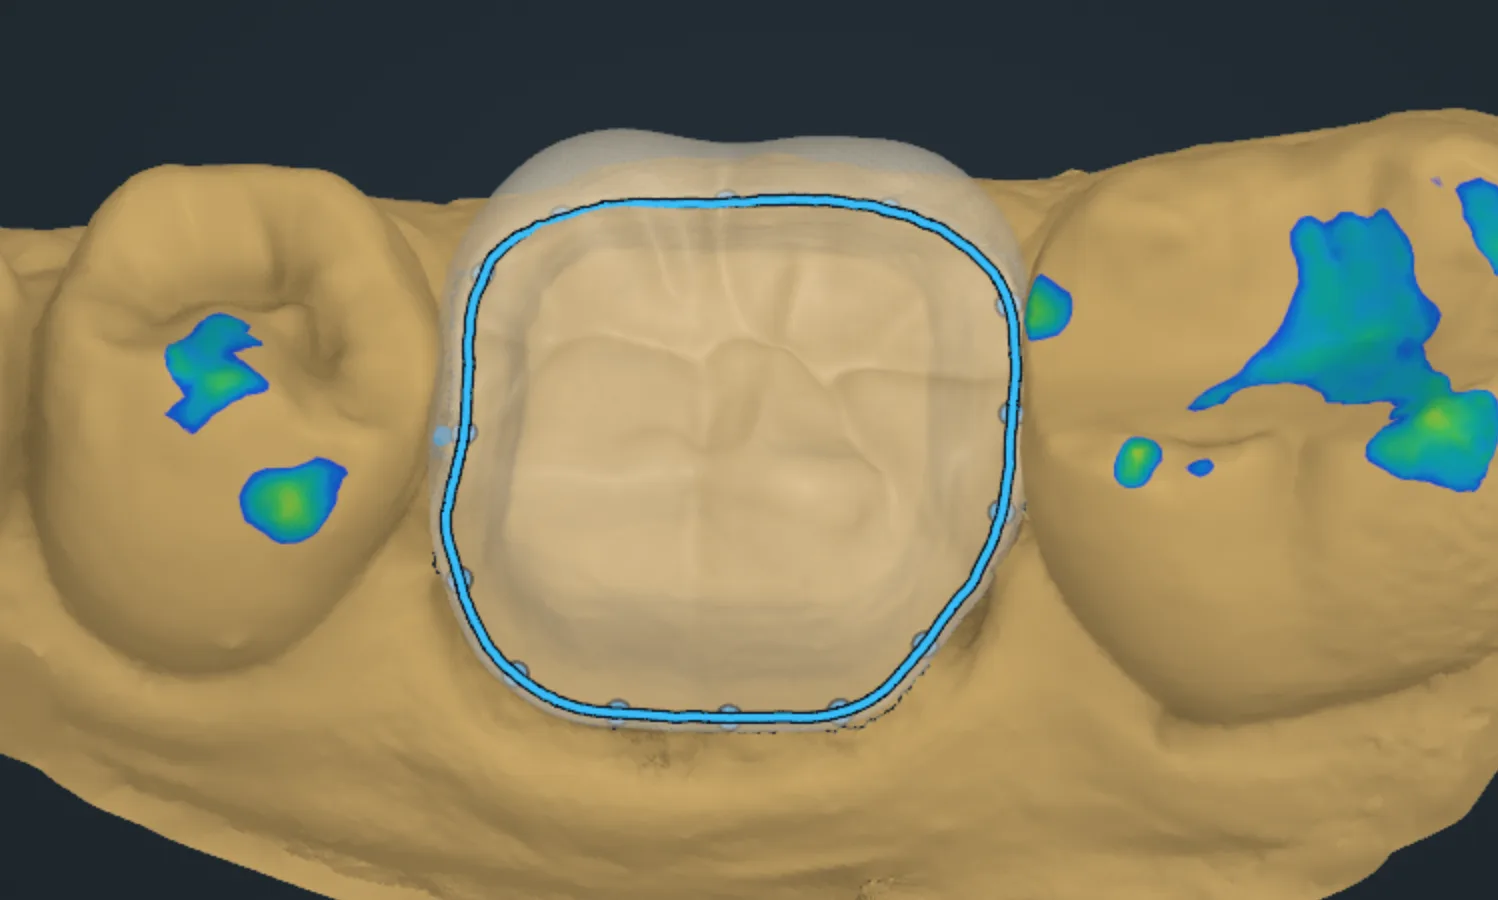
The Margin window opens. The line shows in blue.
2
Find the blue line on the prepared tooth B.
B
3
Turn the scan to follow the line all the way round, between the teeth too.
4
The tooth row C reads On screen · Line: the tooth has a line.
CD
5
The line is right: press DoneD.
You are back in the Crown window.
Tip
Part of the line is wrong? Fix it with Draw, see the next lesson.
Caution
The crown edge follows this line exactly. A line off the finish line leaves the edge short or overhanging.
Fix part of the line
https://occlutrace.ai/en/help/crown/margin-draw
Draw over the wrong part. The new part joins the line, the crown refits on Done.
ACDE
1
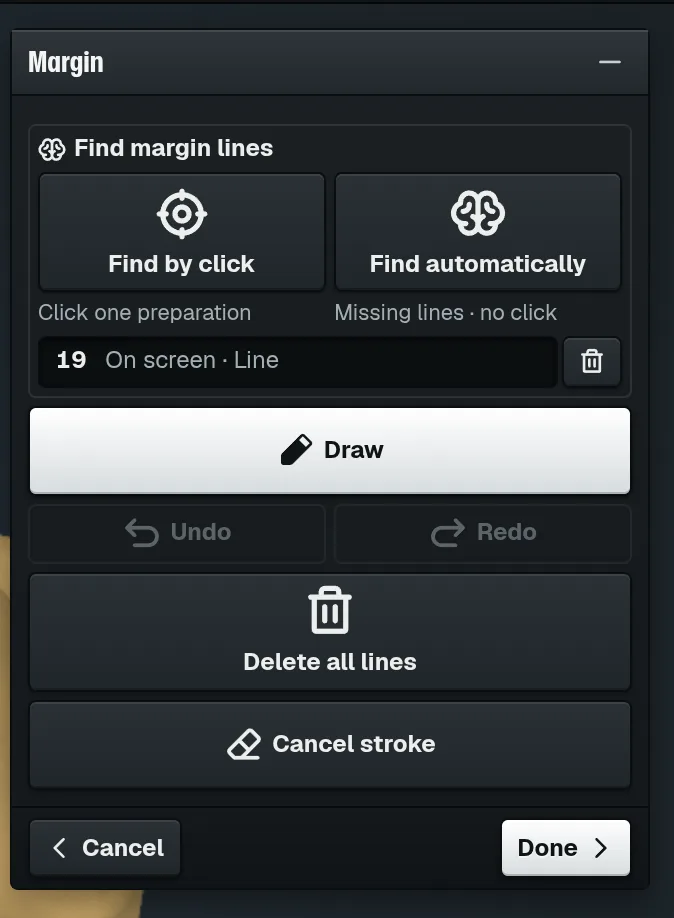
In the Margin window, press DrawA.
Draw turns white.
2
Press and hold on the good line B, next to the wrong part.
B
3
Draw over the wrong part and release on the good line.
The new part joins the line.
4
Stroke went wrong while drawing: press Cancel strokeC.
5
Take back the last change with UndoD.
6
Press DoneE.
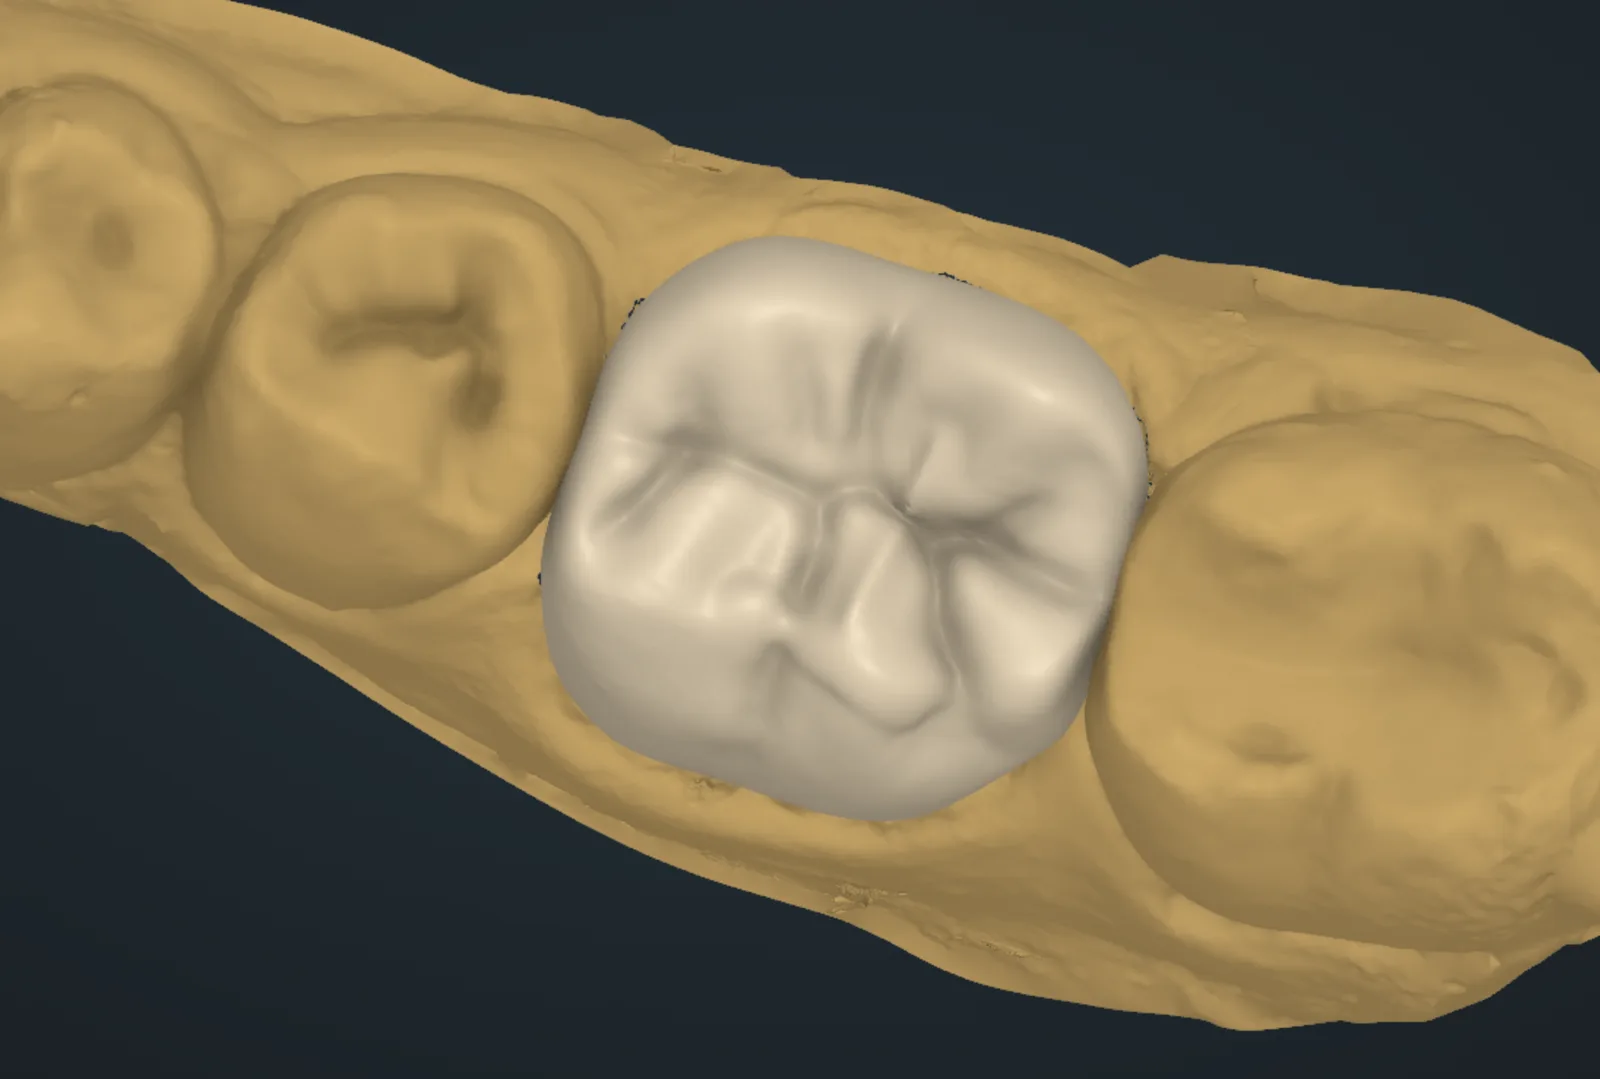
The crown keeps its form and fits the new line.
Tip
Find a missing line
https://occlutrace.ai/en/help/crown/margin-find
No line on the tooth? One click on the tooth, or one press for every missing line.
ABC
1
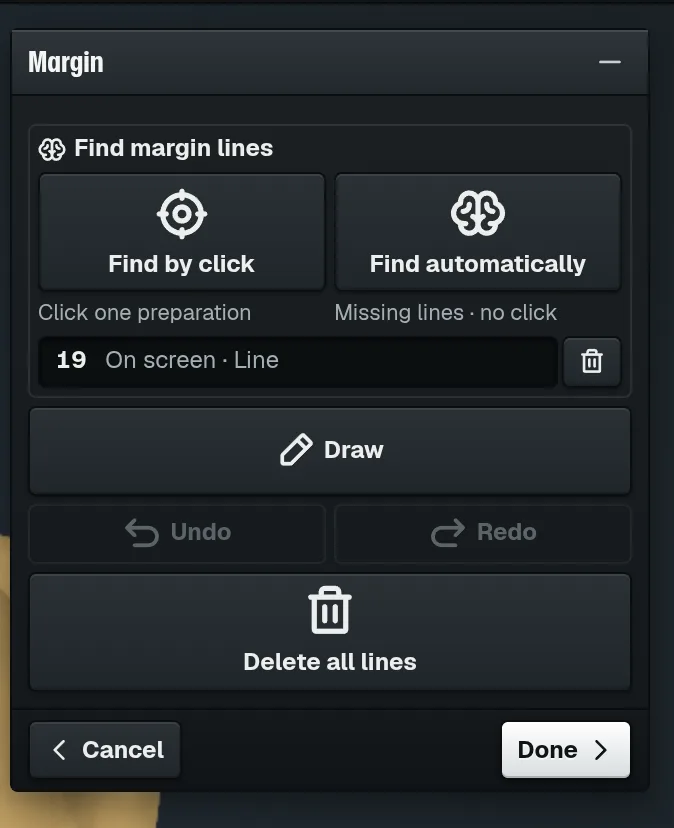
In the Margin window, press Find by clickA.
2
Click once near the centre of the prepared tooth.
The line appears on the tooth.
3
Several teeth have no line: press Find automaticallyB instead.
Every missing line on both jaws is found. No click needed.
4
Check each new line.
5
Press DoneC.
Tip
Nothing found? Click nearer the centre of the tooth, or draw the line with Draw.
The bin beside the tooth row deletes that tooth's line. Undo brings it back.
Check several margins at once
https://occlutrace.ai/en/help/crown/margin-review
A case with two or more prepared teeth stops once on Check the margins before the crowns.
1
Wait in the Margin window for Check the margins.
Every tooth is listed along the arch with its line state.
2
Click a tooth in the list or on the scan.
That tooth's line opens.
3
Fix its line with Draw, or find it with Find by click.
4
Press the button at the bottom, for example Create 3 crowns.
A crown is made on every tooth with a line.
Tip
A tooth with no line gets no crown on that press. The window names it, and you can make it later.
More
Found: the search laid the whole line.
Check: partly found: the search saw only part of the line, or doubts it. Look at it first.
Not found: no line yet. Find it or draw it.
Corrected: you drew or changed this line by hand.
Crown form
Choose the crown form
https://occlutrace.ai/en/help/crown/made
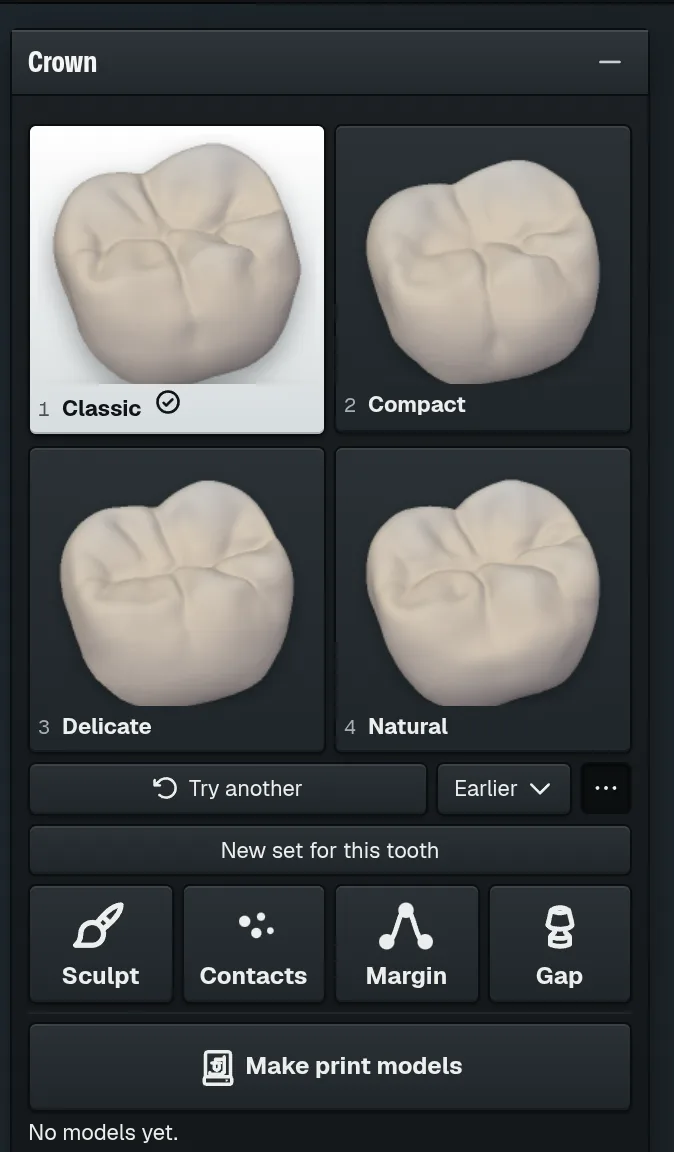
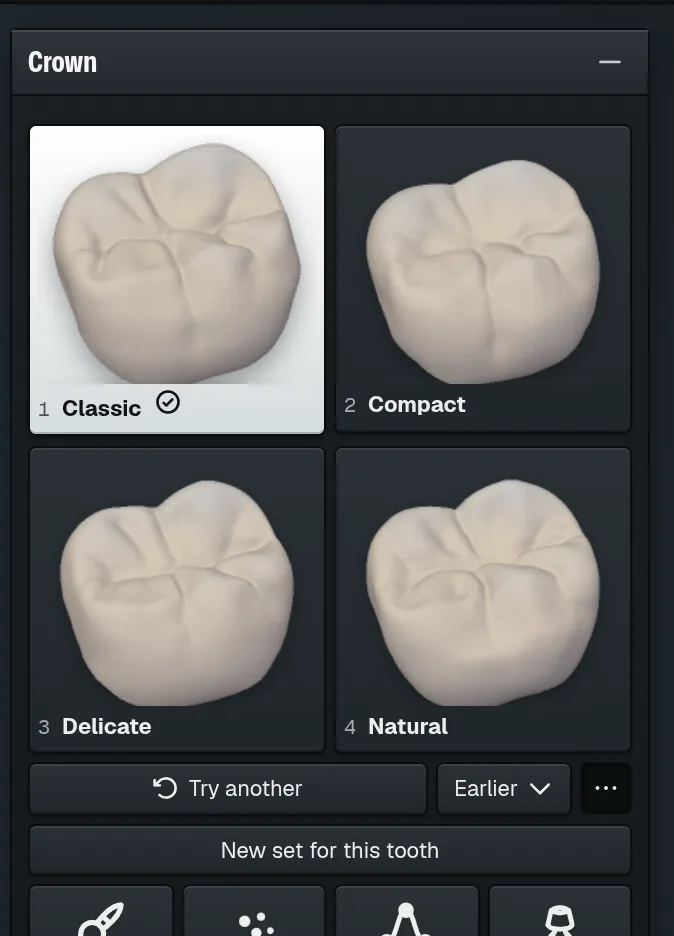
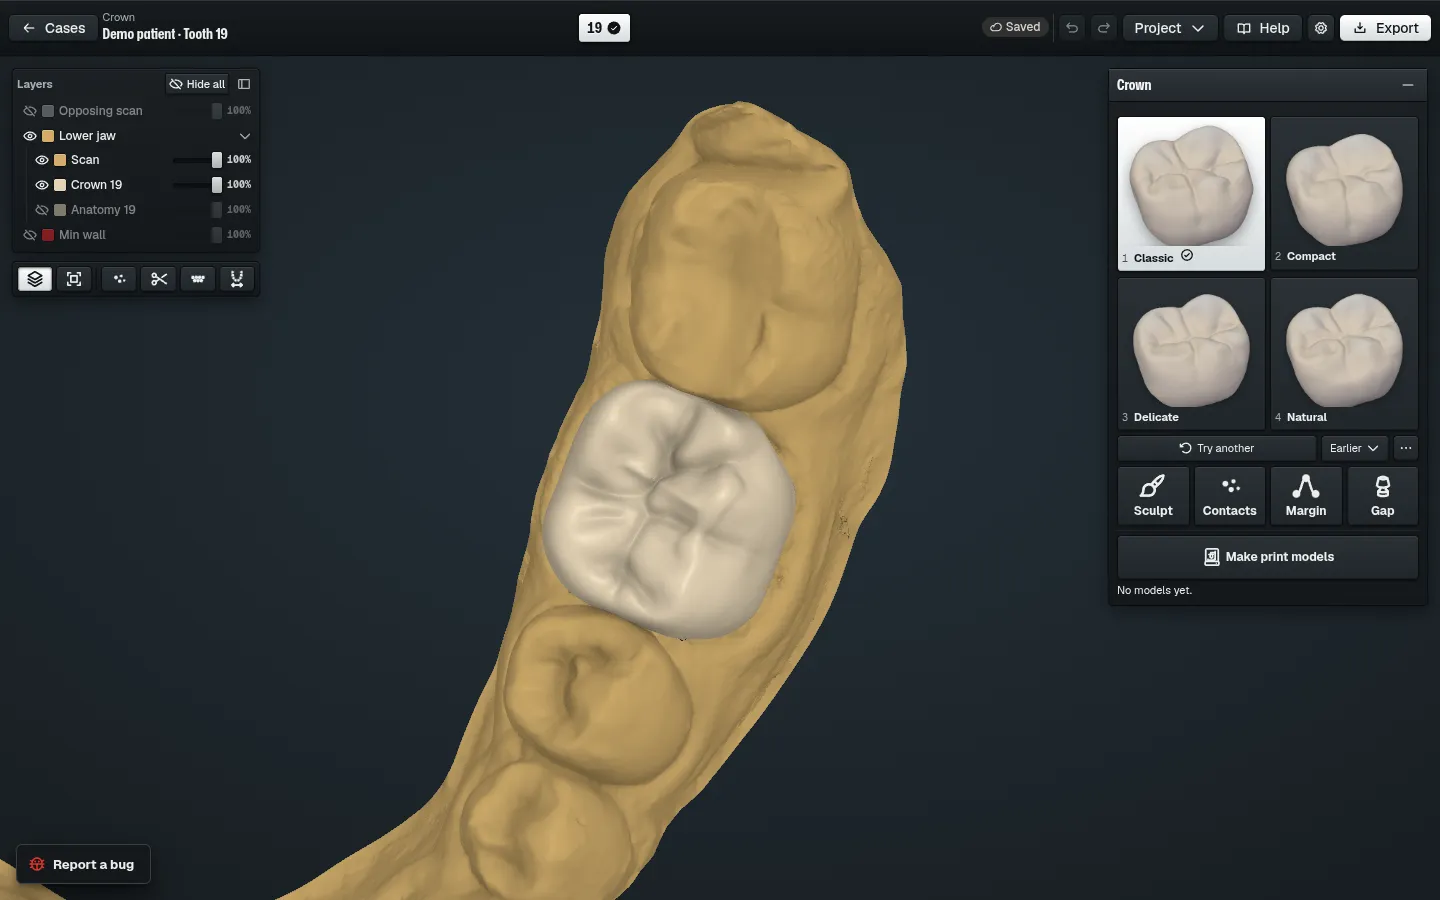
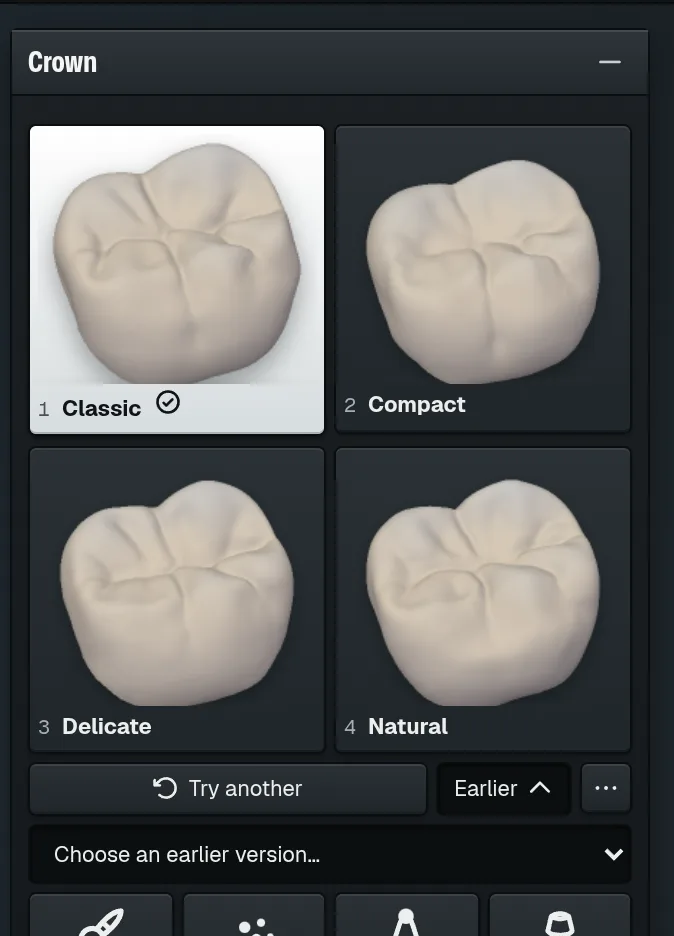
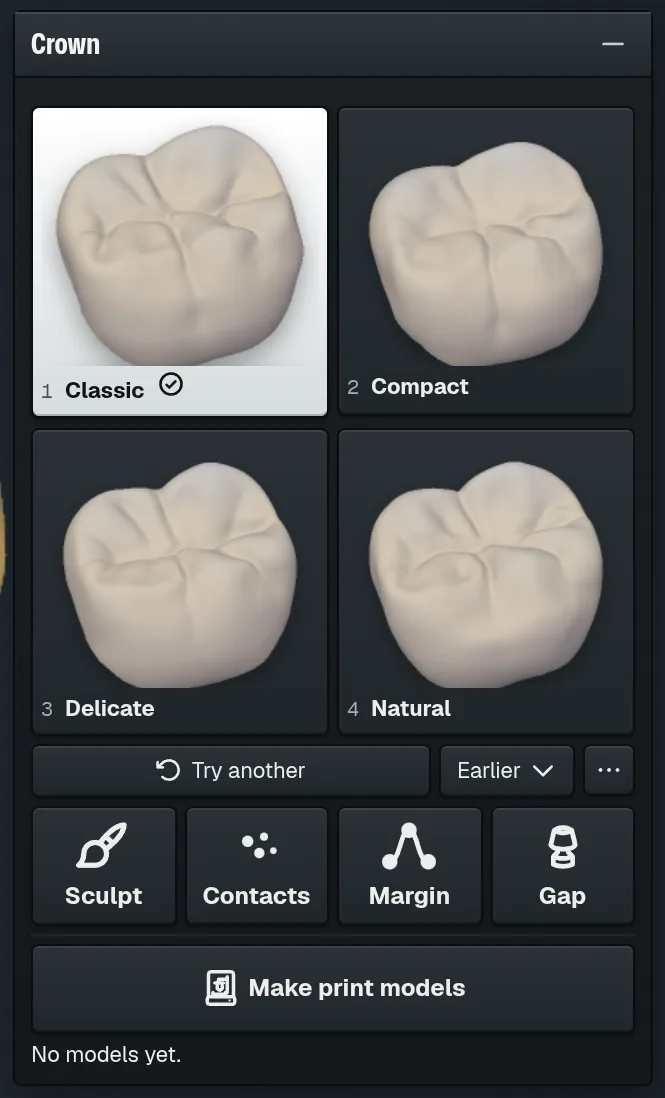
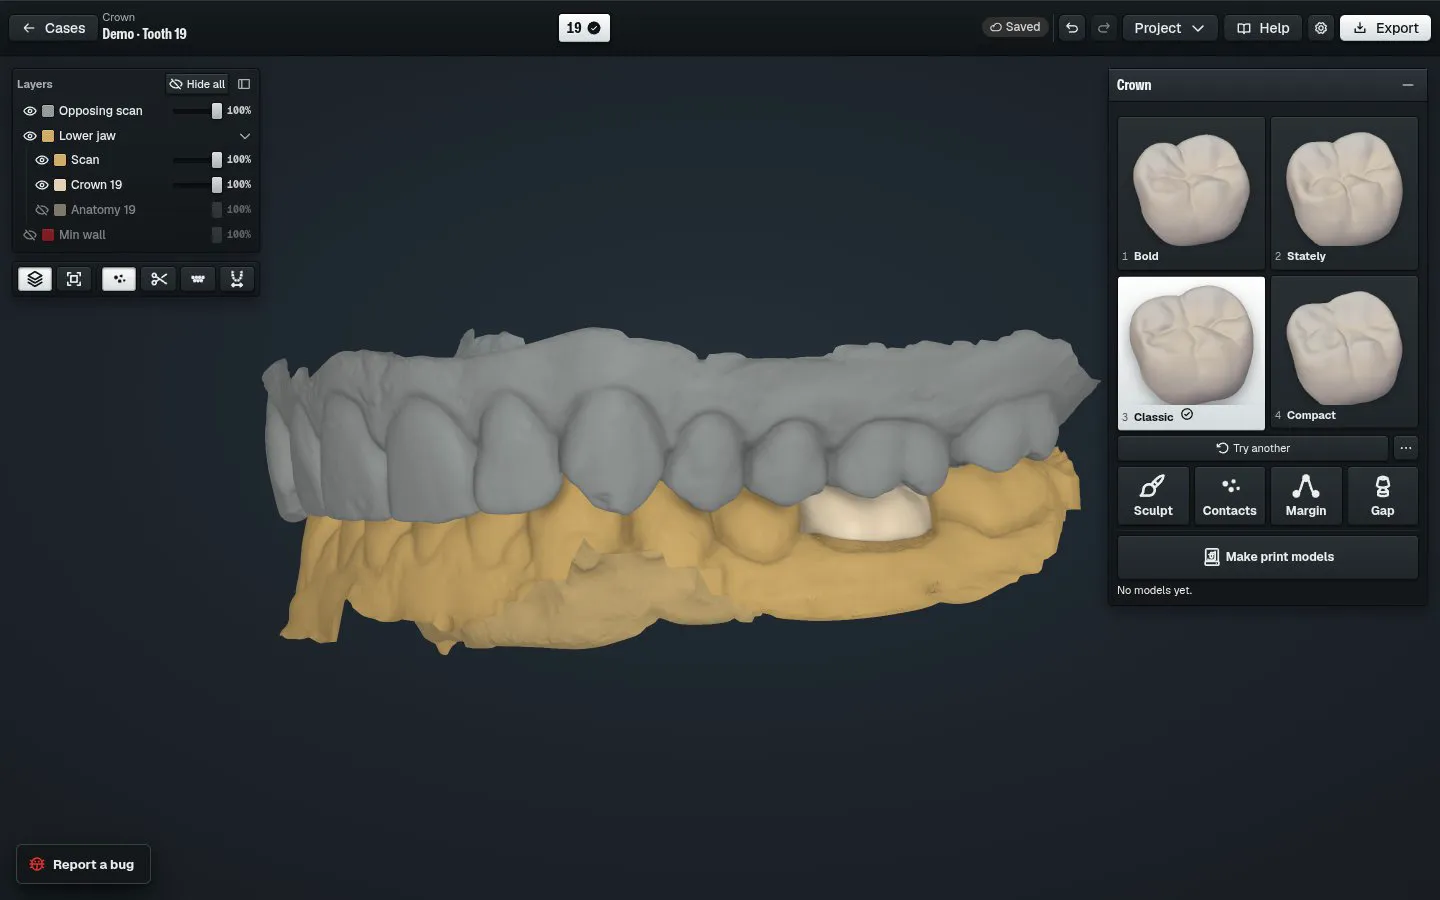
The program makes four forms, seats the first one and fits it to the bite. Click to compare.
1
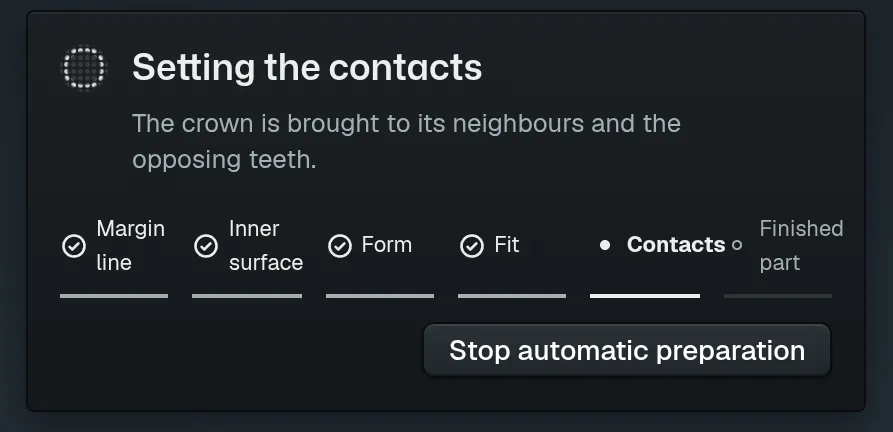
Wait while the progress window walks through the stages A.
A
Each finished stage gets a tick.
2
In the Crown window, the form with the tick B is on the tooth.
BC
3
Click another form C to try it.
The crown on the tooth changes at once.
4
Turn the scan to see the crown from every side.
Click a form: the crown on the tooth changes and the tick moves to it.
Tip
The form in use is wrong? Press Try another under the forms. It redraws only that form.
The line looks wrong while the program works? Press Correct margin when the progress window offers it.
More
The names say how each form differs from the others, so they change from case to case.
Compact is lower, Stately taller. Delicate is narrower from cheek to tongue, Bold wider.
Refined is narrower along the arch, Sturdy wider. Youthful has sharper cusps, Seasoned softer, worn cusps.
Classic and Natural differ least from the others.
Go back to an earlier form
https://occlutrace.ai/en/help/crown/form-earlier
Each form keeps its earlier versions. Pick one to put it back on the tooth.
ABC
1
In the Crown window, click the form you want back A.
2
Under the forms, press EarlierB.
The Choose an earlier version… box appears under the forms.
3
Open the list Choose an earlier version…C.
4
Pick a time to bring back that version.
The crown on the tooth returns to that version.
5
Or pick Original shape to drop your later changes to this form.
Tip
Earlier appears once the form has an earlier version.
Changed it a moment ago? The top bar Undo is faster.
Make a new set of forms
https://occlutrace.ai/en/help/crown/form-more
Not one of the four fits? Ask for four new forms for this tooth.
ABC
1
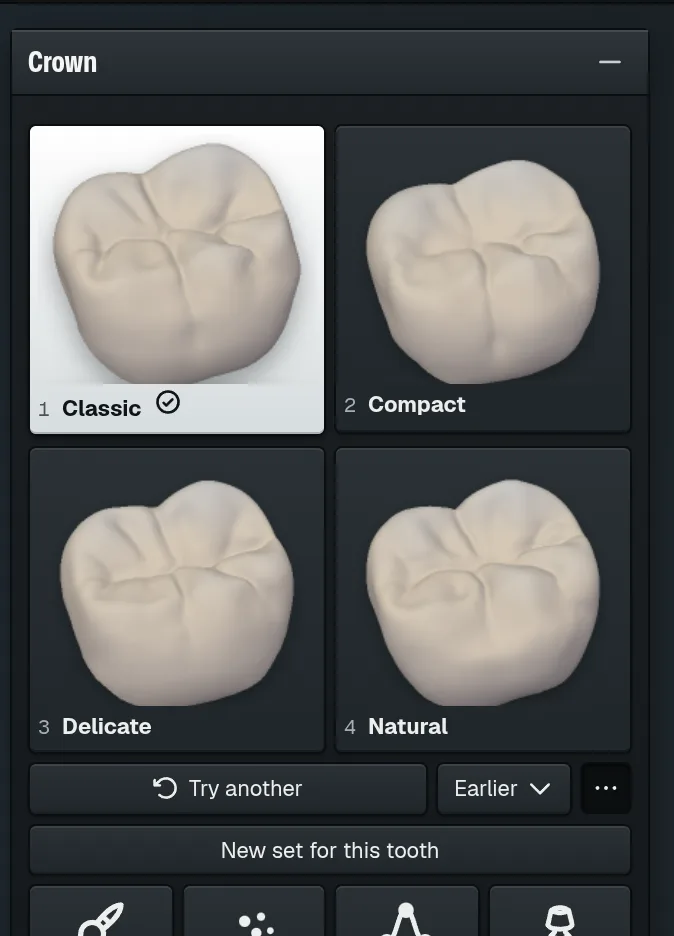
In the Crown window, press More form optionsA, the three dots.
2
Press New set for this toothB.
The program makes four new forms for this tooth.
3
Click a new form to try it.
Tip
Try anotherC redraws only the form in use; New set for this tooth redraws all four.
The previous forms stay in Earlier.
More
On an incisor or canine the menu also offers Mirror: the same tooth from the other side of the arch, copied onto this one.
In a case with several crowns it also offers Generate all teeth: new forms for every crown, one tooth after another.
Inner surface
Set thickness and cement gap
https://occlutrace.ai/en/help/crown/inner-gap
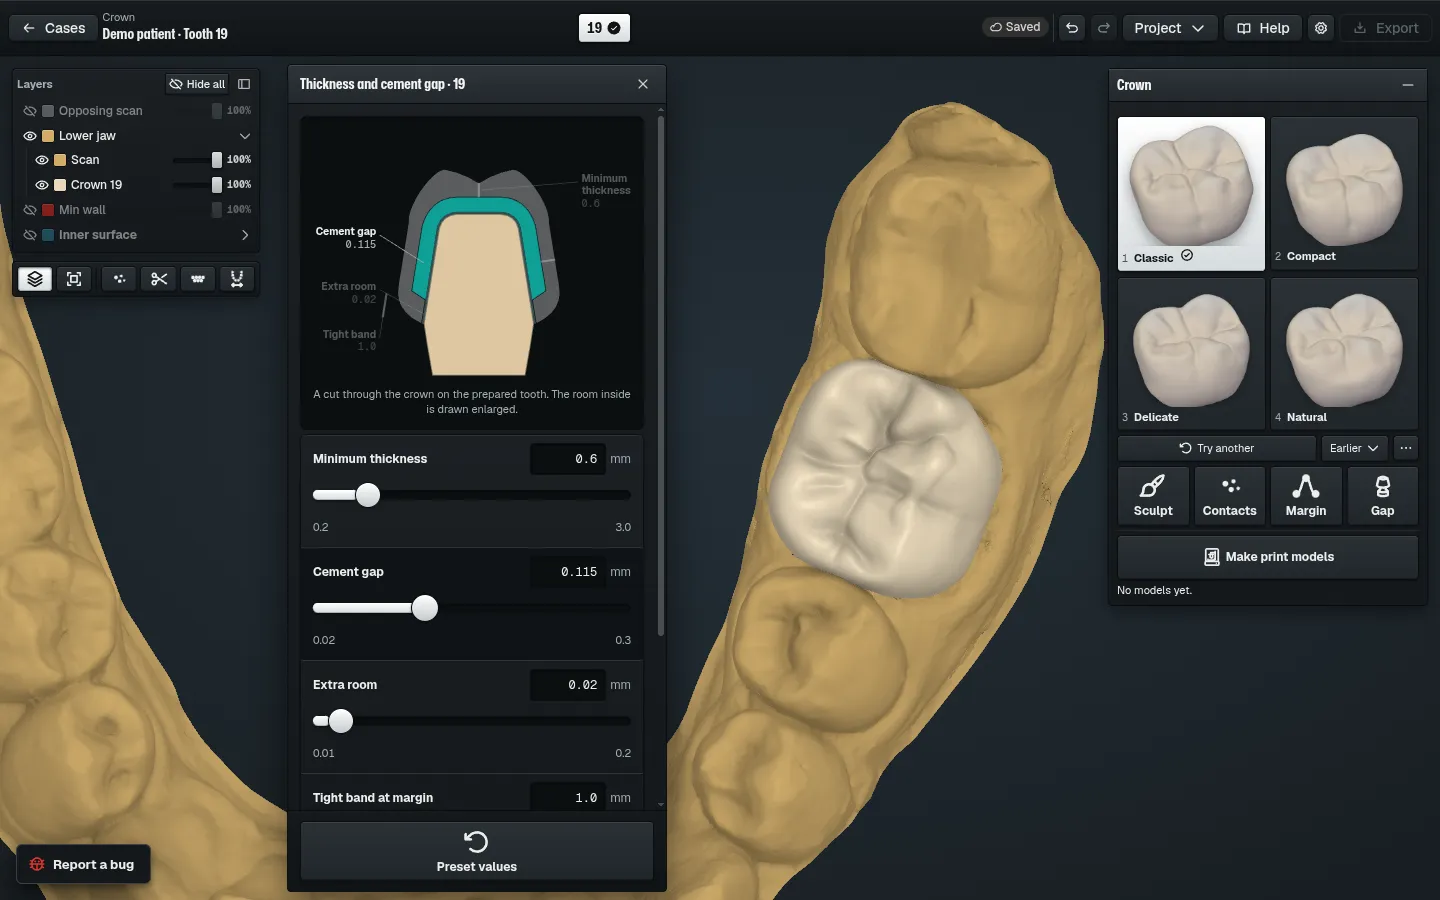
Four numbers set the crown wall and the room inside. The crown refits when you let go.
A
1
In the Crown window, press GapA.
BCDEFG
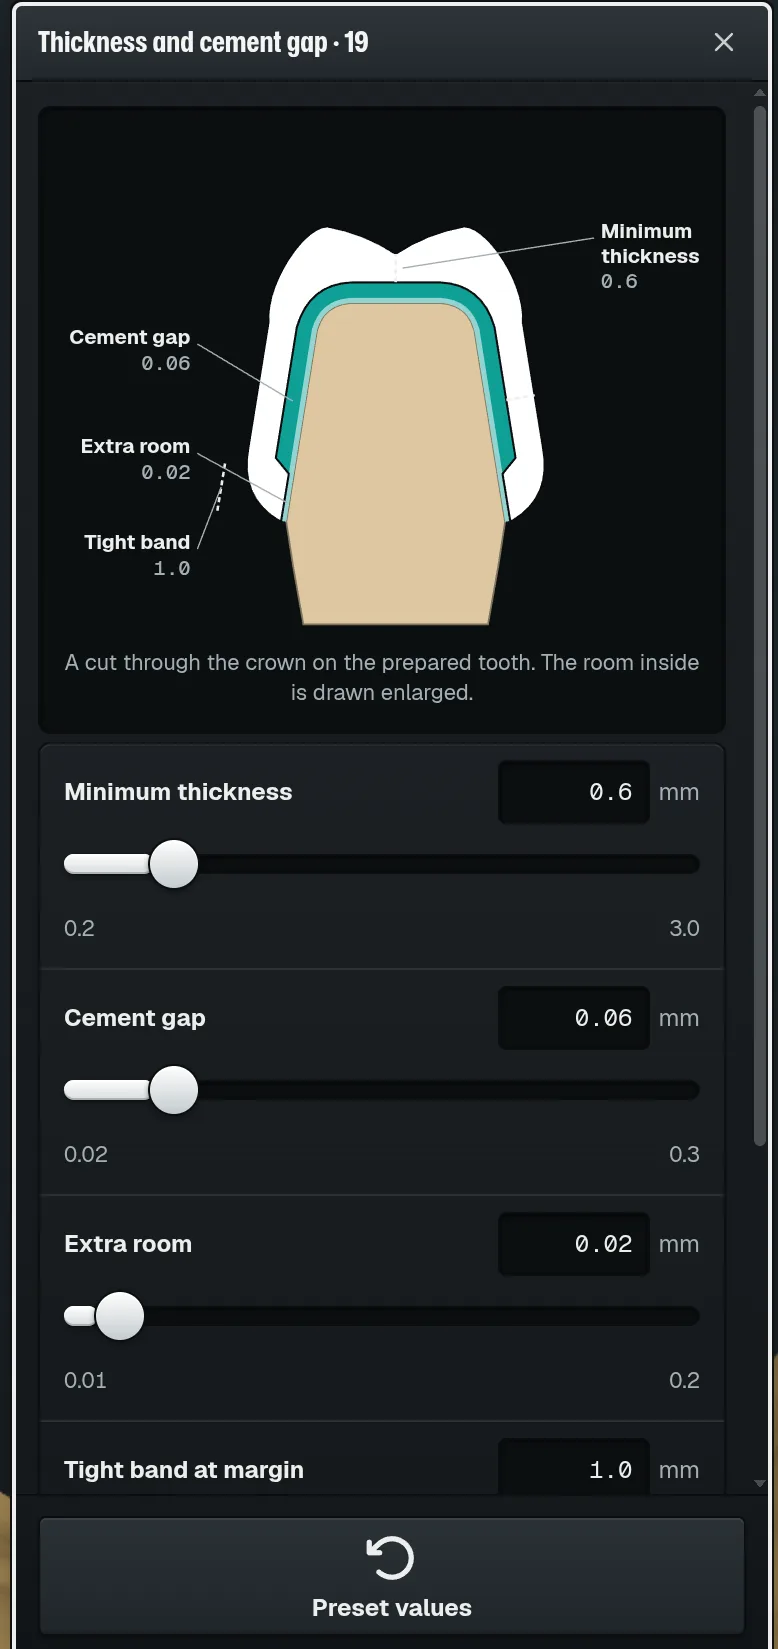
The Thickness and cement gap window opens beside the crown.
2
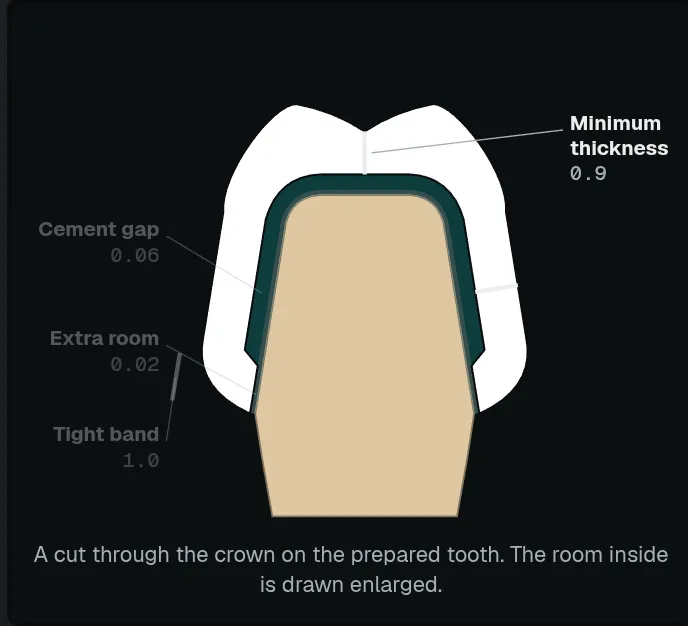
Minimum thicknessC: the thinnest the crown wall may be.
C
3
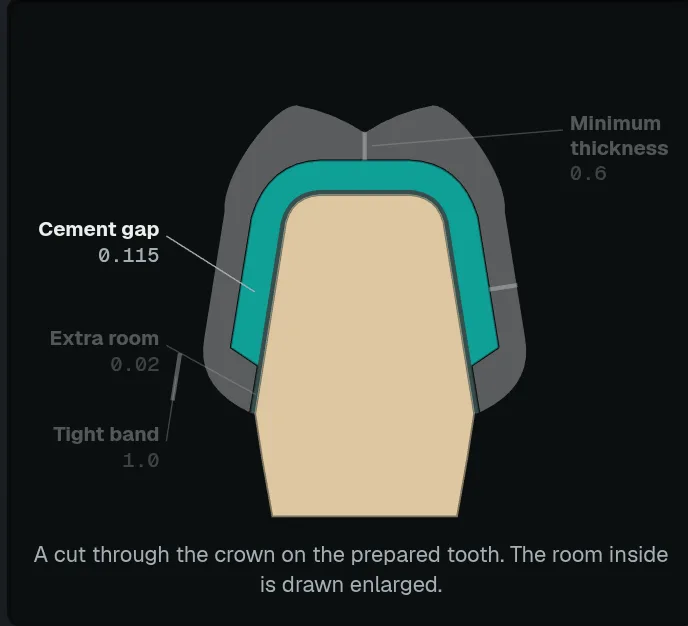
Cement gapD: room for cement over the walls and the top.
D
4
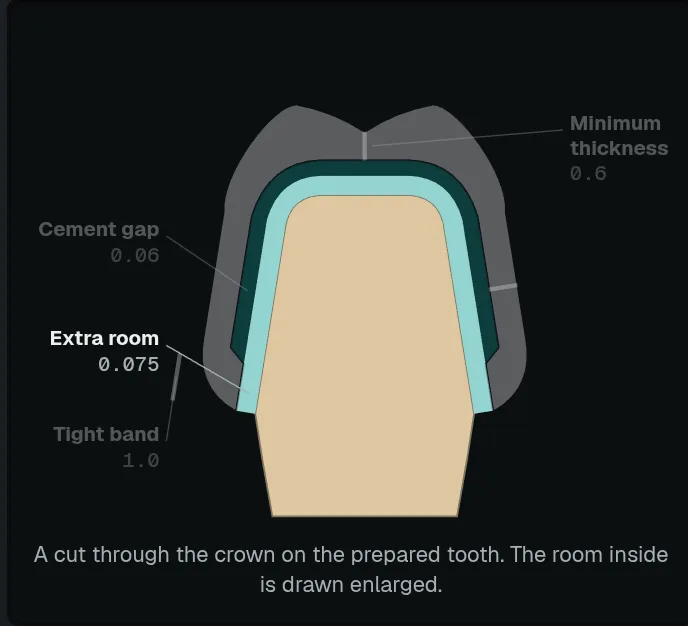
Extra roomE: added everywhere, margin included, for scan and milling error.
E
5
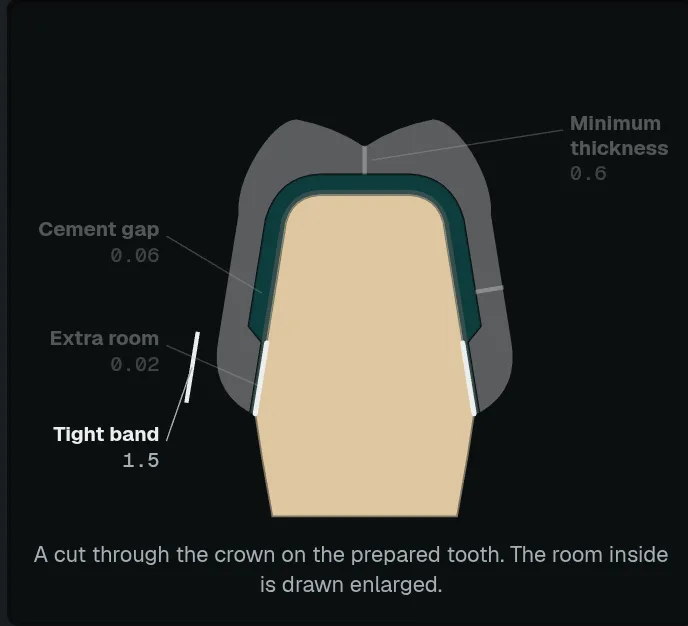
Tight band at marginF: how far up from the margin the crown fits tight.
F
6
Drag a slider or type a number, then let go.
The inner surface rebuilds. A made crown is fitted again, its form kept.
Drag Cement gap: the cement layer in the crown-cut picture grows with the number.
Tip
Point at a value and its zone lights up in the crown-cut picture B. The room inside is drawn enlarged.
Preset valuesG puts every value in this window back to the order's preset.
Caution
Keep Minimum thickness at or above the material value: zirconia 0.6 mm, lithium disilicate 0.5 mm. A thinner wall can break.
More
Zirconia: Minimum thickness 0.6 mm, Cement gap 0.06 mm, Extra room 0.02 mm, Tight band at margin 1.0 mm.
Lithium disilicate: Minimum thickness 0.5 mm, Cement gap 0.06 mm, Extra room 0.02 mm, Tight band at margin 1.2 mm.
Printed resin, permanent or temporary: Minimum thickness 0.8 mm, Cement gap 0.08 mm, Extra room 0.02 mm, Tight band at margin 1.0 mm.
Inside the tight band the only room is Extra room. Above it the room is Cement gap plus Extra room: 0.08 mm with the zirconia values.
Extra room sets the room sideways and along the seating direction together. If a case holds two different numbers, the window says so; a change sets both.
Slider ranges: Minimum thickness 0.2 to 3.0 mm, Cement gap 0.02 to 0.3 mm, Extra room 0.01 to 0.2 mm, Tight band at margin 0 to 3.0 mm. A production order can narrow them.
A coping shows Coping wall in place of Minimum thickness: 0.5 mm by default, 0.2 to 2.0 mm.
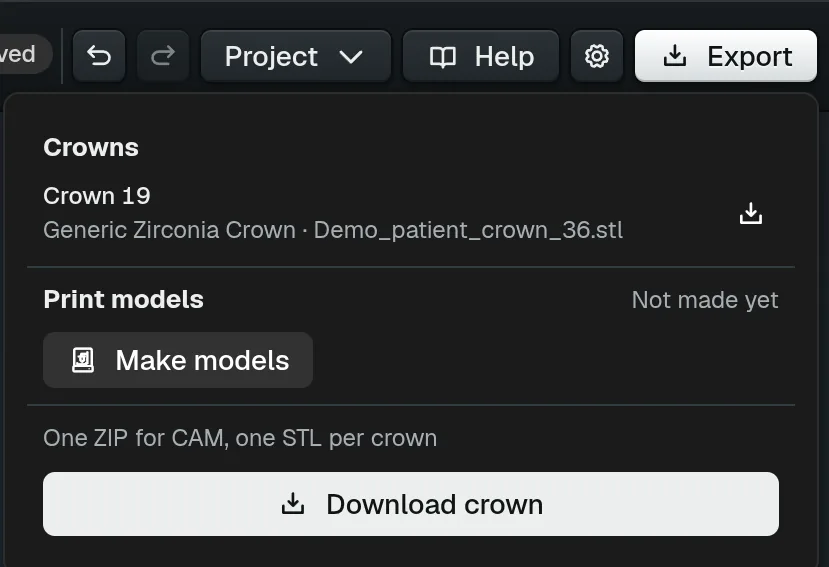
The models are kept in the case. Download them from the Export sheet and print.
AB
1
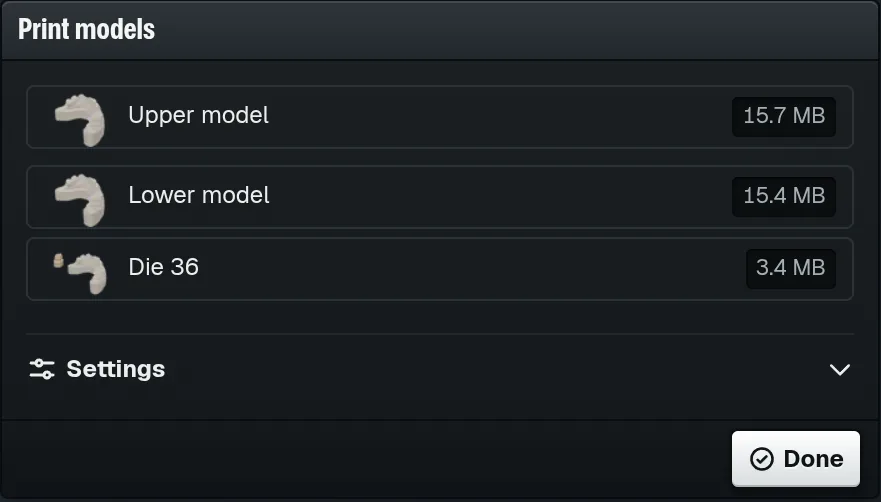
When the build ends, check the list of files A.
2
Press DoneB.
C
The Crown window counts the models made C.
3
At the top right, press Export.
The sheet lists each model with a download icon.
4
Press the download icon on a model's line.
Your browser saves that model as an STL file.
5
In your slicer, place each file as it comes: flat on its base.
Tip
Print the dies upright, with no supports on the seat.
Changed the crown after? The sheet marks the models as from an earlier design; press Rebuild in Print models.
Save and go back to a version
https://occlutrace.ai/en/help/crown/versions
Save a version before a big change. Restore brings the design back to that point.
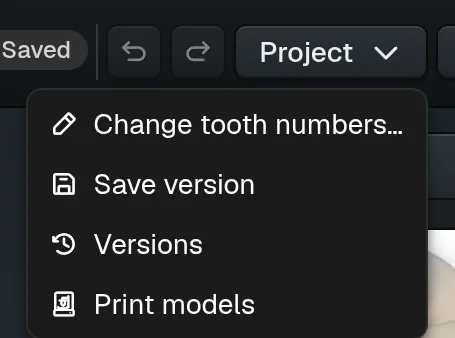
ABC
1
At the top, open ProjectA.
2
Before a big change, press Save versionB or Ctrl/Cmd+S.
The design as it is now is kept as a version.
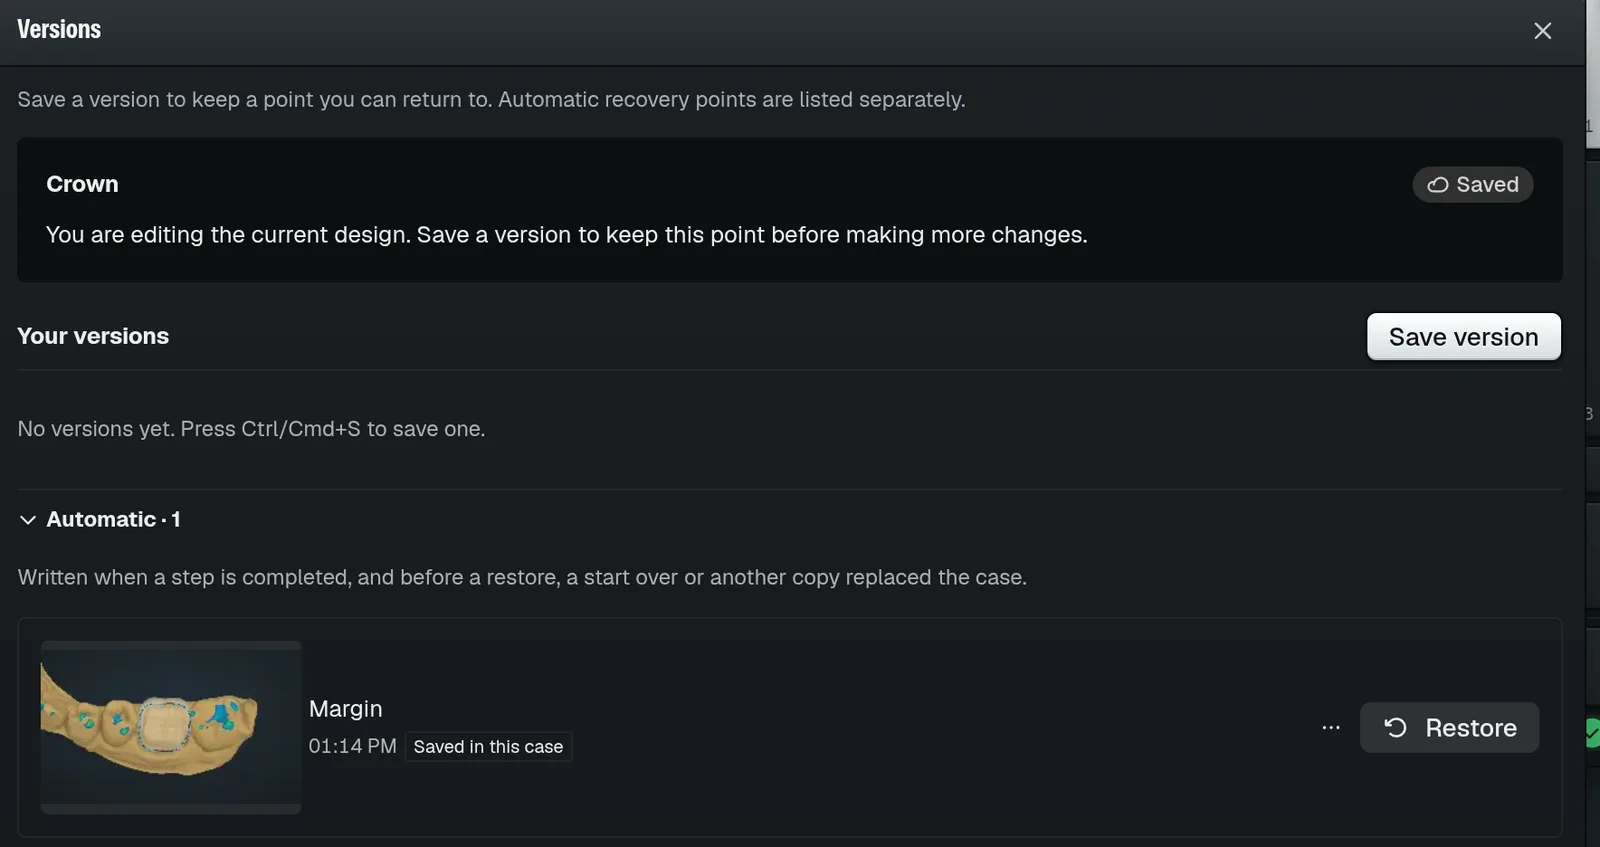
3
To go back, open Project and press VersionsC.
The Versions window lists your versions and automatic points.
4
Press RestoreD on the point you want.
D
After you confirm, the design returns to that point.
Tip
Start over, at the bottom of the window, clears the design and starts again from the scans; the old design stays under
Scans
Add, replace or remove a scan
https://occlutrace.ai/en/help/crown/scans-manage
Swap a scan file, add a pre-op scan or drop the opposing scan in one window.
1
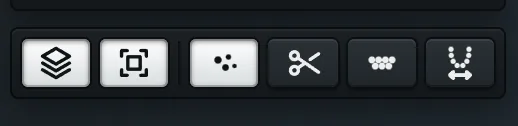
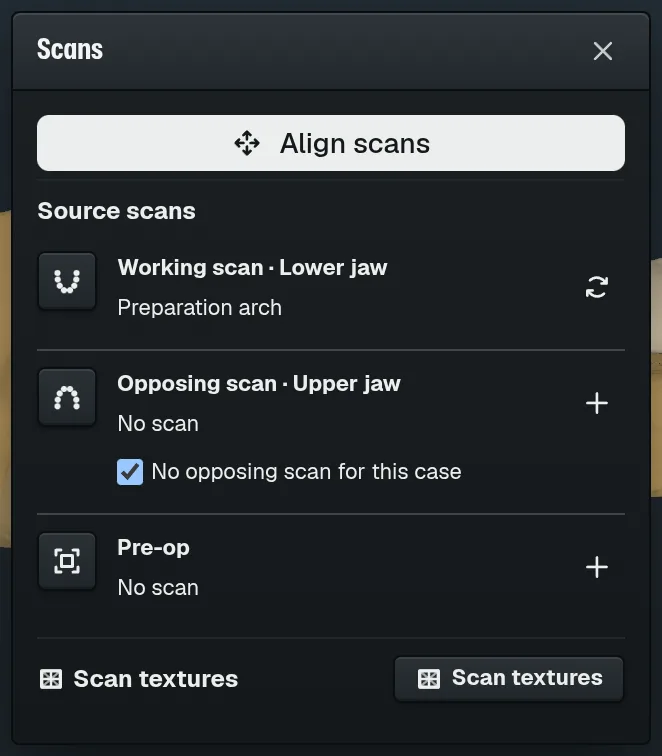
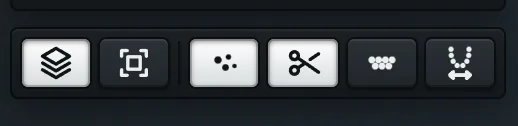
On the view tools, press Manage scansA.
A
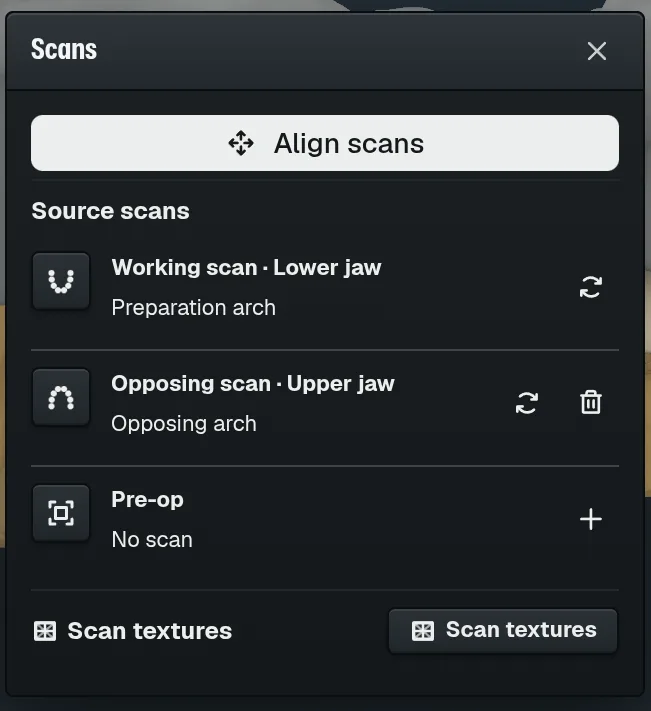
The Scans window lists every scan of the case.
2
On the scan's row, press Replace scanB or Add scanC.
BCEG
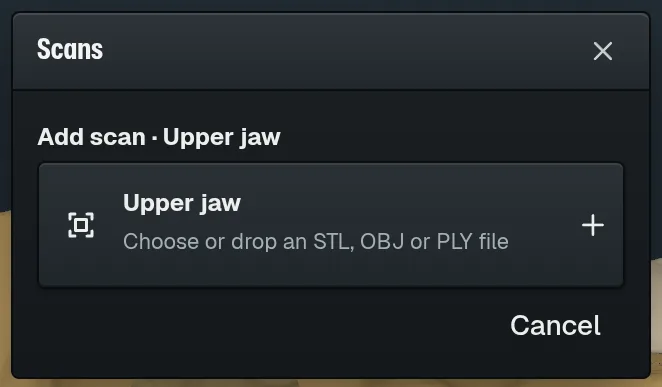
3
Drop an STL, OBJ or PLY file on the box D, or click it.
D
The new file loads into that row.
4
To take a scan out, press Remove scanE.
5
Press Remove to confirm.
The row says No scan. Undo brings it back.
6
If the case has one jaw only, tick No opposing scan for this caseF.
F
Bite and Jaw motion are switched off for this case.
Tip
Scan texturesG shows or hides the scan colours on every scan.
More
Working scan: the prepared jaw. It can be replaced but not removed.
Opposing scan: the other jaw. It can be replaced or removed.
Pre-op: the jaw before preparation, kept for reference. After adding it, press Align to working scan on its row.
Replacing the working scan clears its margin lines and the crown placement. Undo restores the previous scan and design.
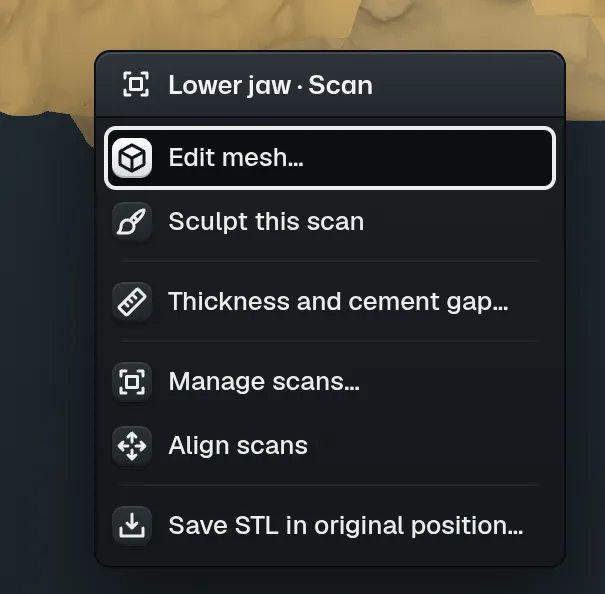
The window also opens from the right-click menu: Manage scans….
Delete or crop part of a scan
https://occlutrace.ai/en/help/crown/scan-cut
Mark an area on the scan, then delete it or keep only it.
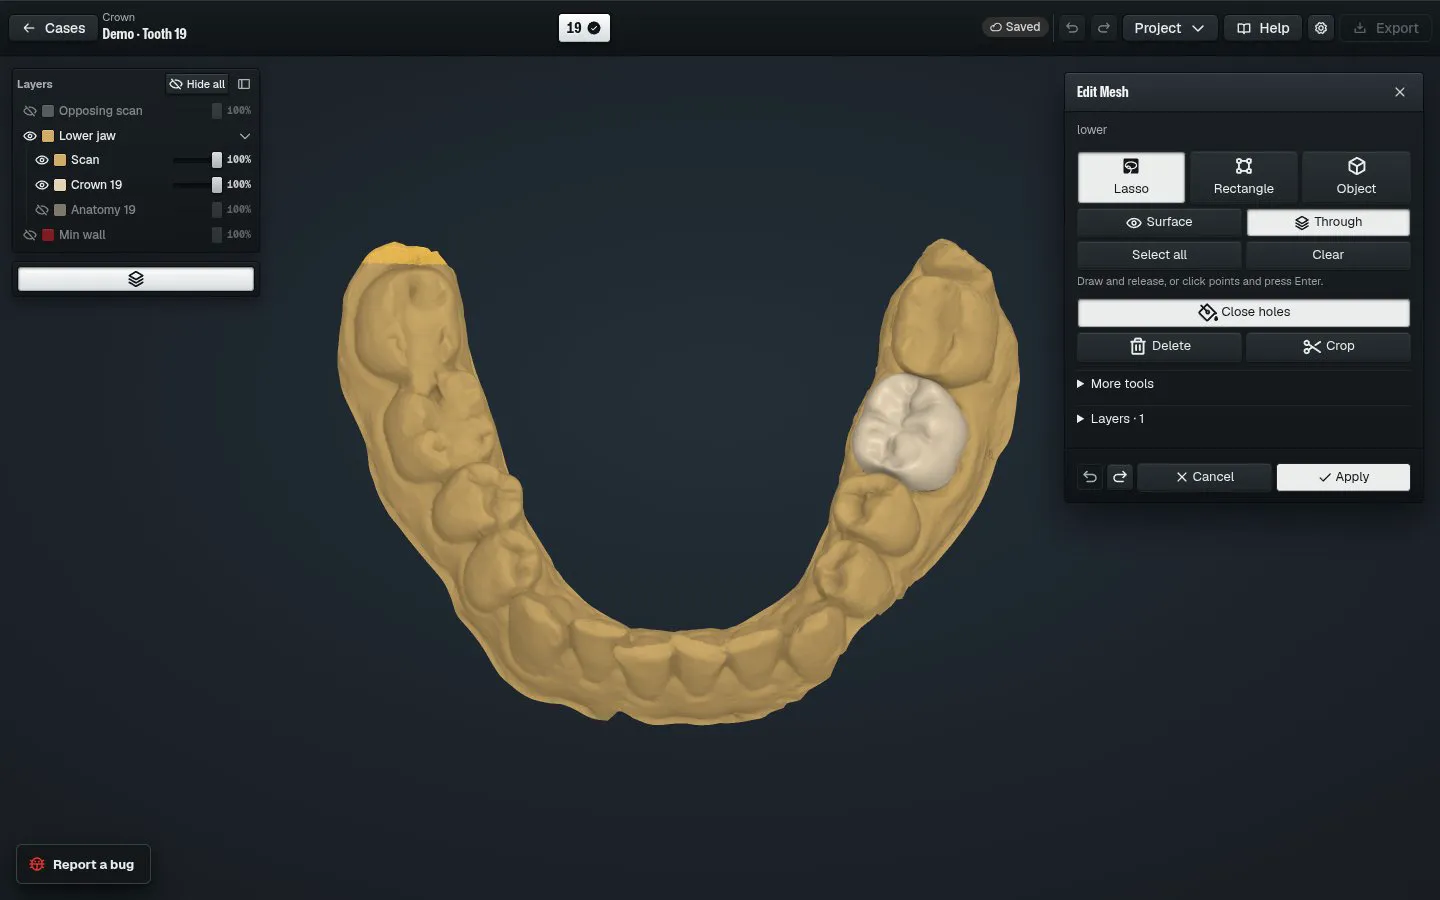
1
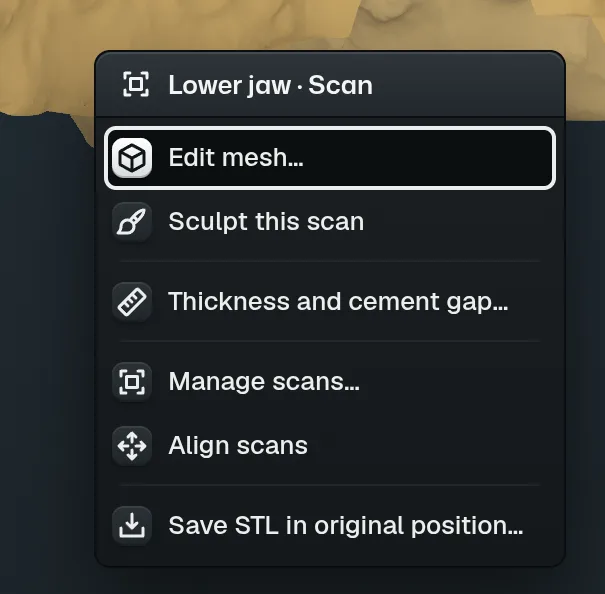
Right-click the scan and choose Edit mesh…A.
A
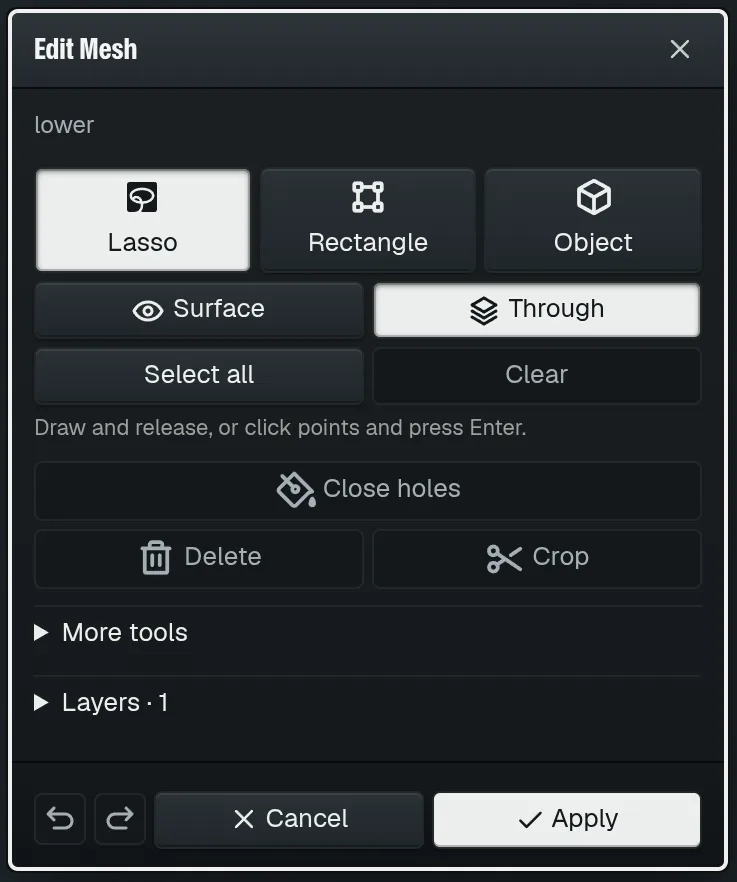
The Edit Mesh window opens on that scan.
2
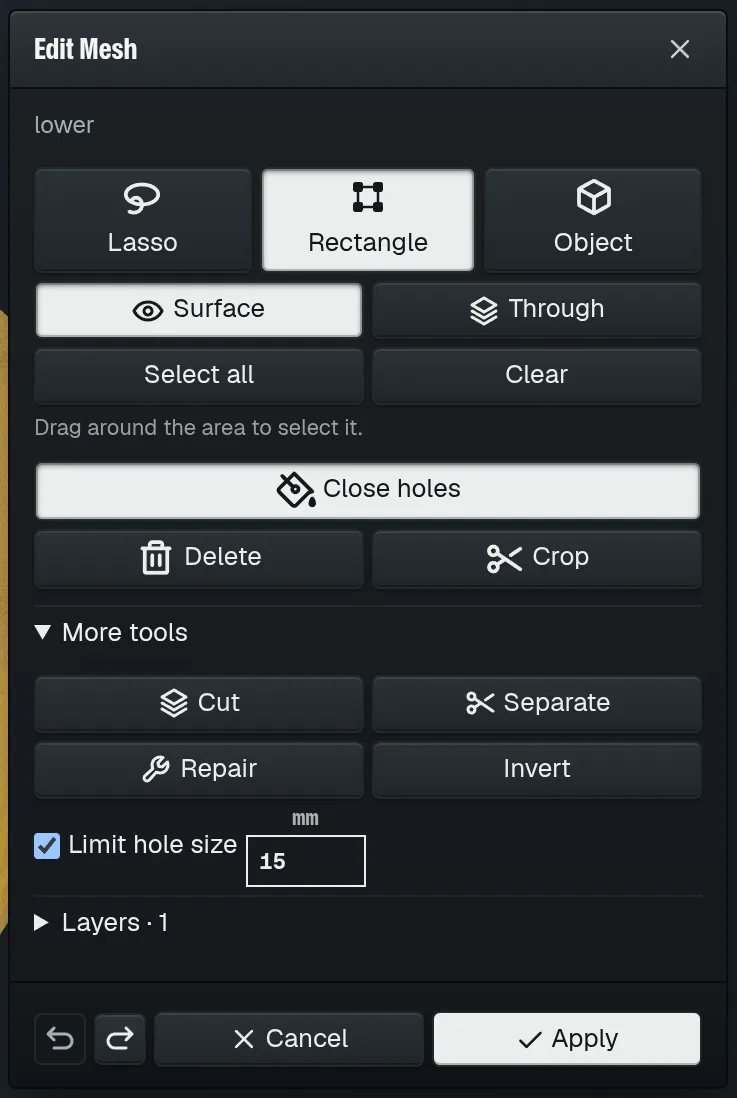
Choose LassoB, RectangleC or ObjectD.
BCDEFHIJK
3
Choose SurfaceE for what you see, or ThroughF for the whole depth.
4
Draw around the area on the scan G.
G
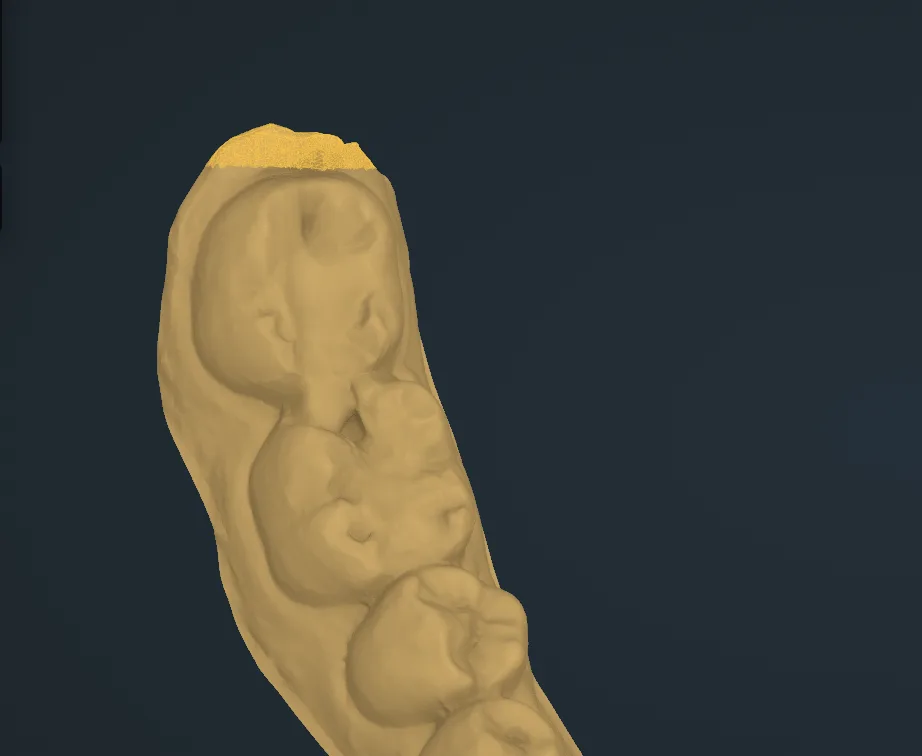
The marked faces turn yellow.
5
Close holes and repair a scan
https://occlutrace.ai/en/help/crown/scan-holes
Fill gaps inside the scan and clean up broken faces before you design.
Before you start
Edit Mesh is open on the scan: right-click it and choose Edit mesh….
ABCDEF
1
Mark the faces around the hole, or press Select allA.
2
Press Close holesB.
The status line reads Closed safe interior holes.
3
Open More toolsC.
4
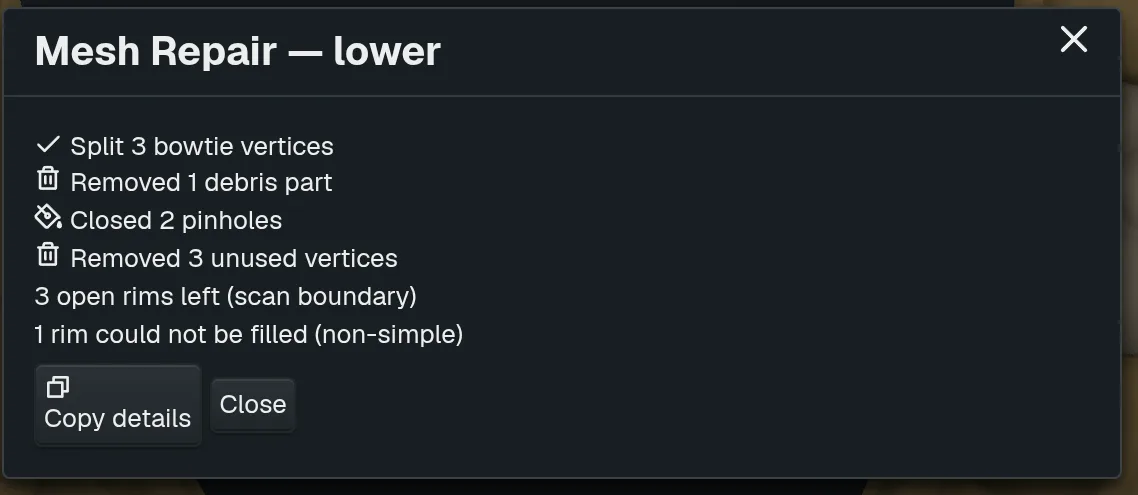
Press RepairD.
A report lists each fix the repair made.
5
Press Apply to keep the changes.
Tip
Sculpt a scan
https://occlutrace.ai/en/help/crown/scan-sculpt
Smooth or build up a spot on the working or opposing scan.
1
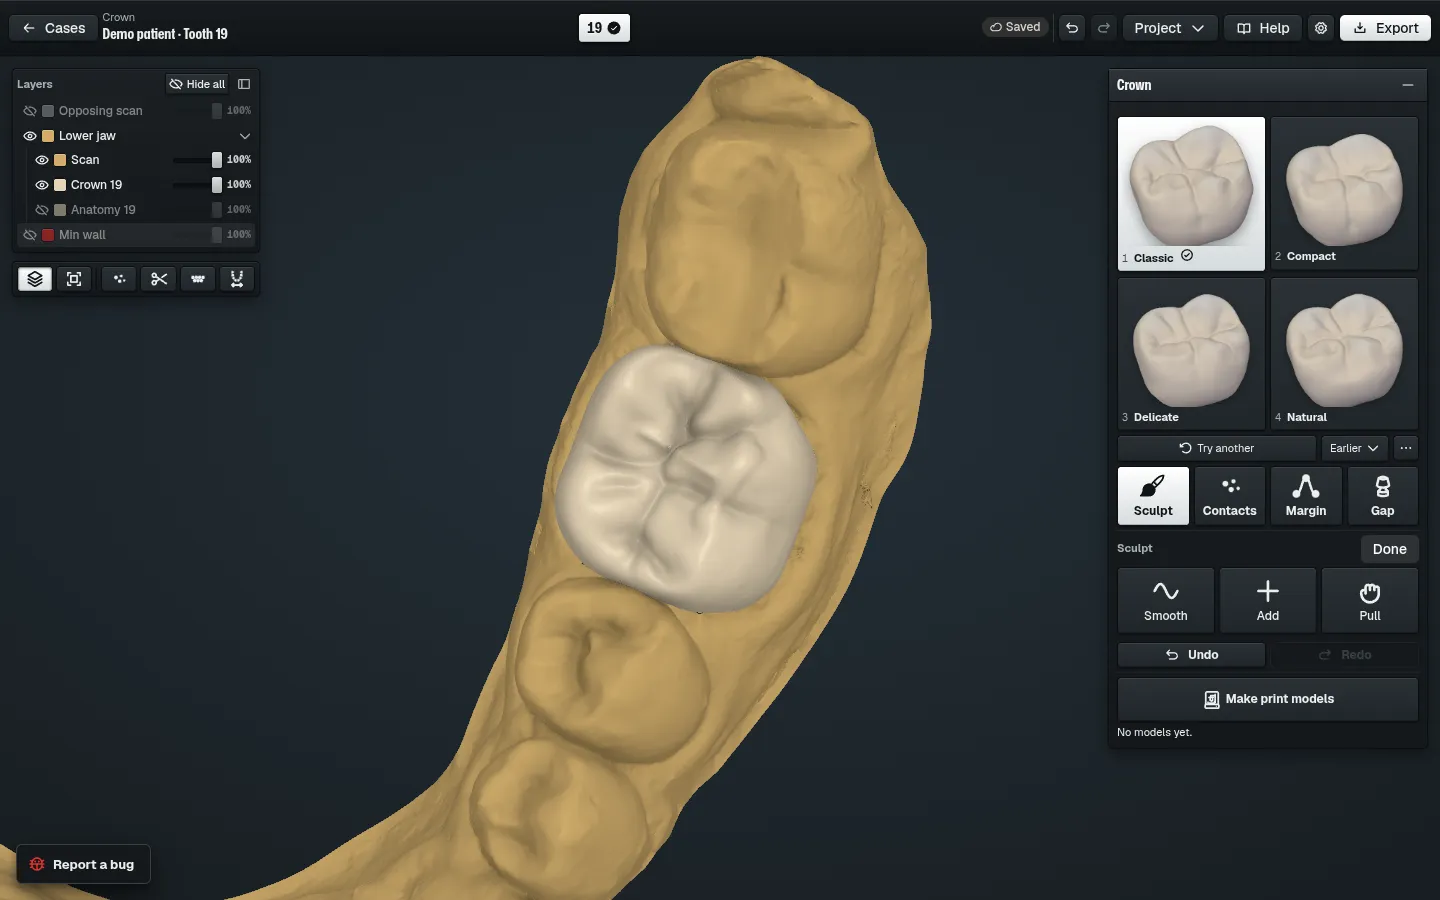
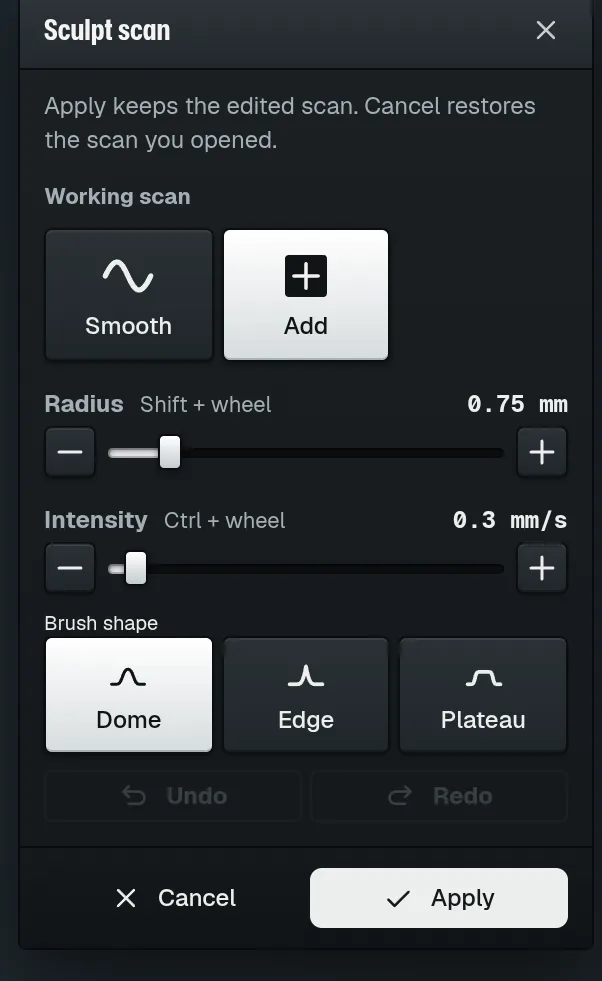
Right-click the scan and choose Sculpt this scanA.
A
The Sculpt scan window opens.
2
Choose SmoothB or AddC.
BCDE
3
Drag on the scan. With Add, hold Shift to carve.
4
Press ApplyD to keep the edited scan.
5
To drop the edit, press CancelE.
6
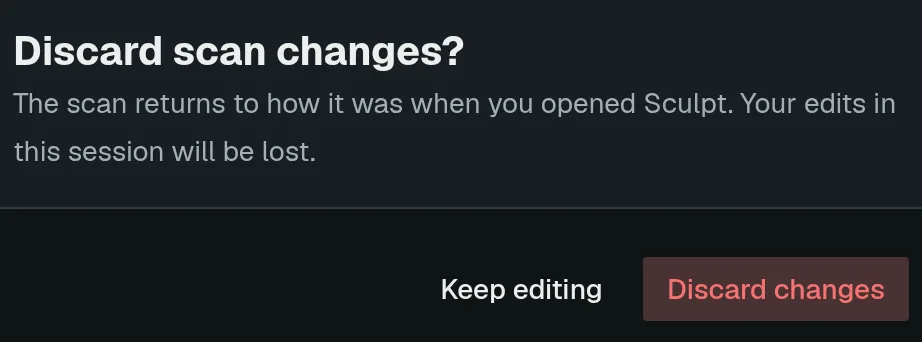
Press Discard changesF.
F
View and layers
Show or hide case parts
https://occlutrace.ai/en/help/crown/layers
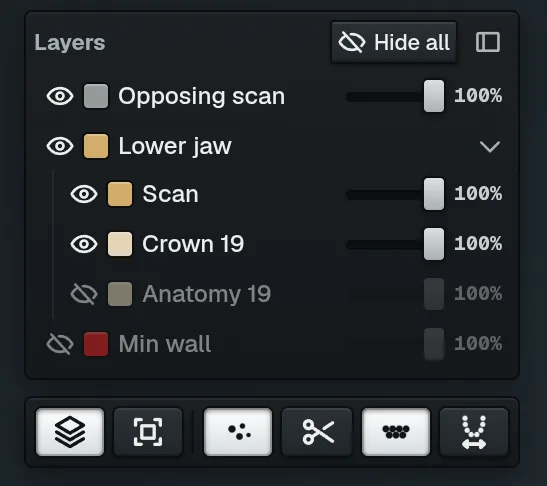
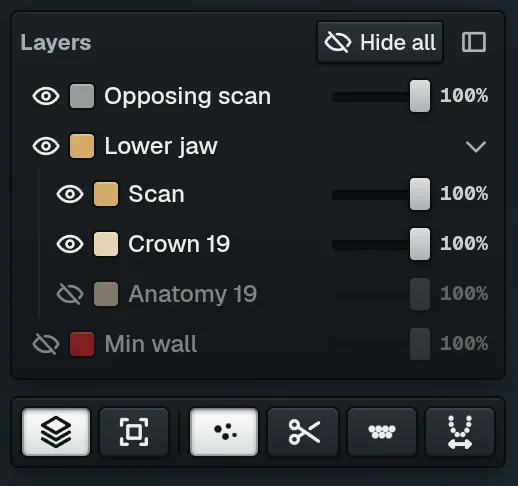
Turn each scan and crown part on or off, or make it see-through.
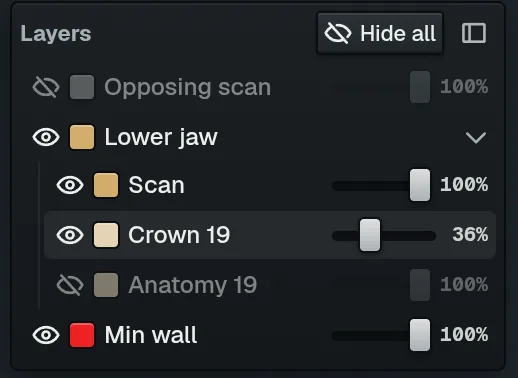
ABCDEF
1
On the view tools, press LayersA.
The list shows each scan and crown part.
2
Click the eye B to hide or show one part.
3
Drag its slider C to make the part see-through.
4
Press Hide allD to hide everything.
The button now reads Show all.
Key A hides and shows the opposing scan.
Tip
Double-click a row to show only that part.
When the crown is hidden, the Crown window offers Show tooth.
More
Keys over the 3D view: A opposing scan E, S working scan F, D anatomy, F final part, P pre-op.
U or X shows or hides the upper jaw, L or N the lower jaw.
Opacity goes from 5 % to 100 %.
Look at a cross-section
https://occlutrace.ai/en/help/crown/section
Cut through the crown and the scan to check the fit and measure the wall.
1
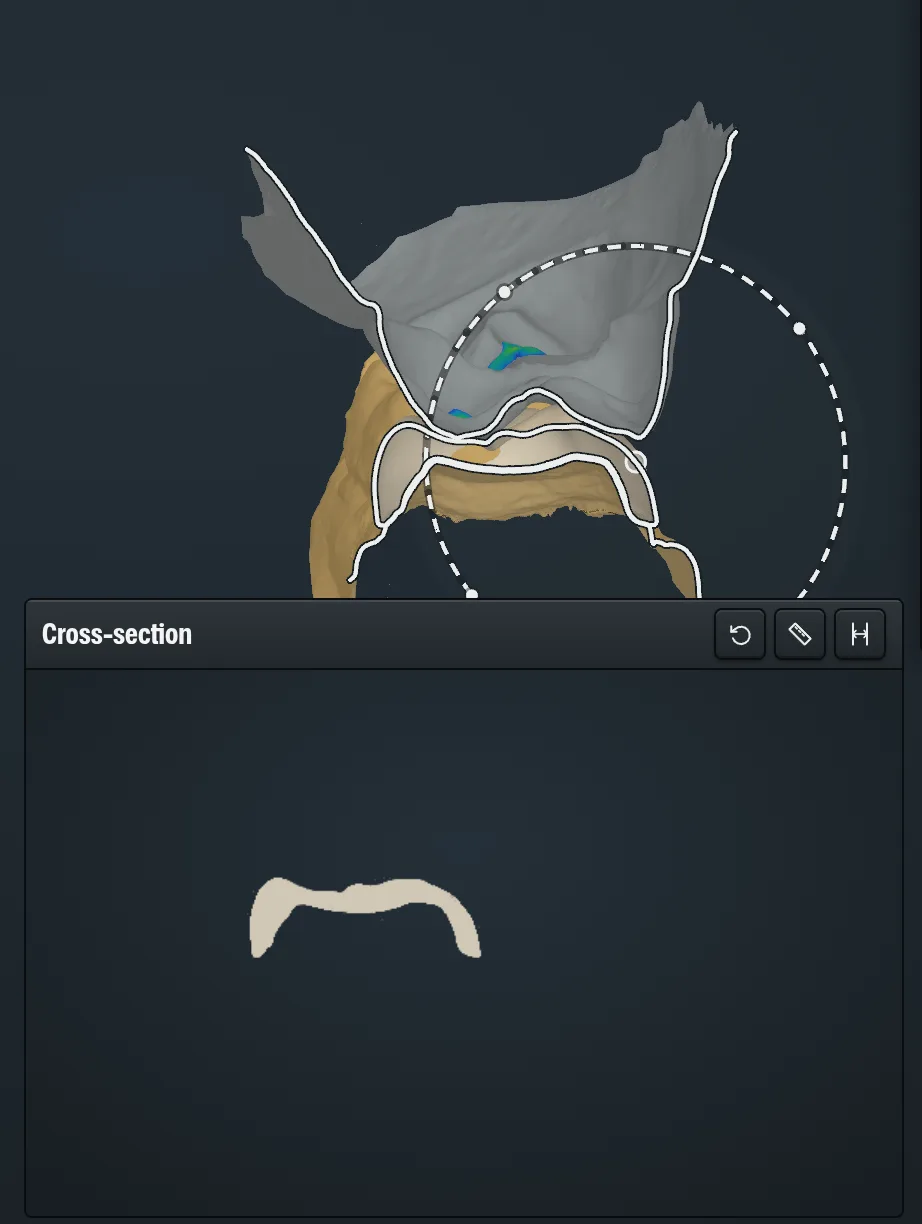
On the view tools, press Section view (C)A, or press C.
A
A dashed ring follows the pointer over the scene.
2
Move the ring over the prepared tooth B.
BCDEF
3
Click to fix the cut.
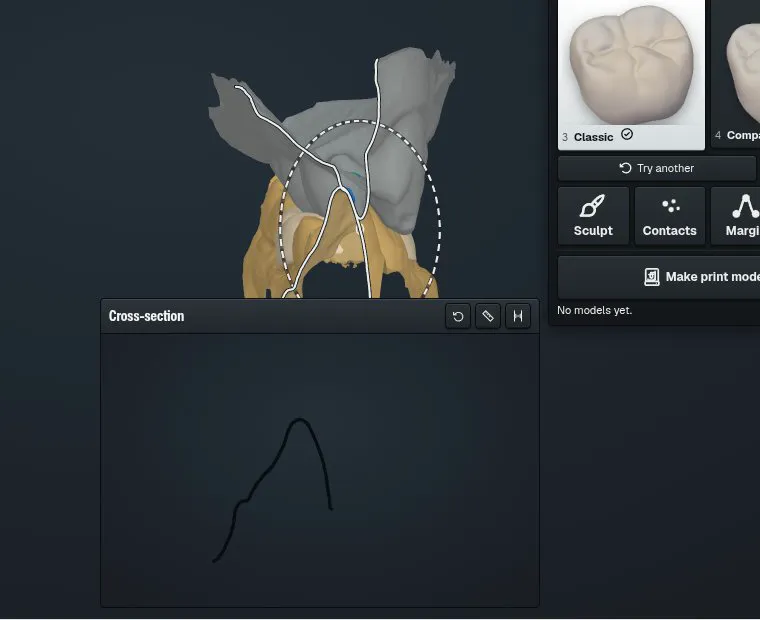
Cross-sectionC shows the cut.
4
Press Measure wall thicknessE or H.
5
Click the crown outline on the cut.
6
Press C again to close the section.
Move the cut across the tooth and watch the cross-section.
Tip
Find keys and view settings
https://occlutrace.ai/en/help/crown/shortcuts
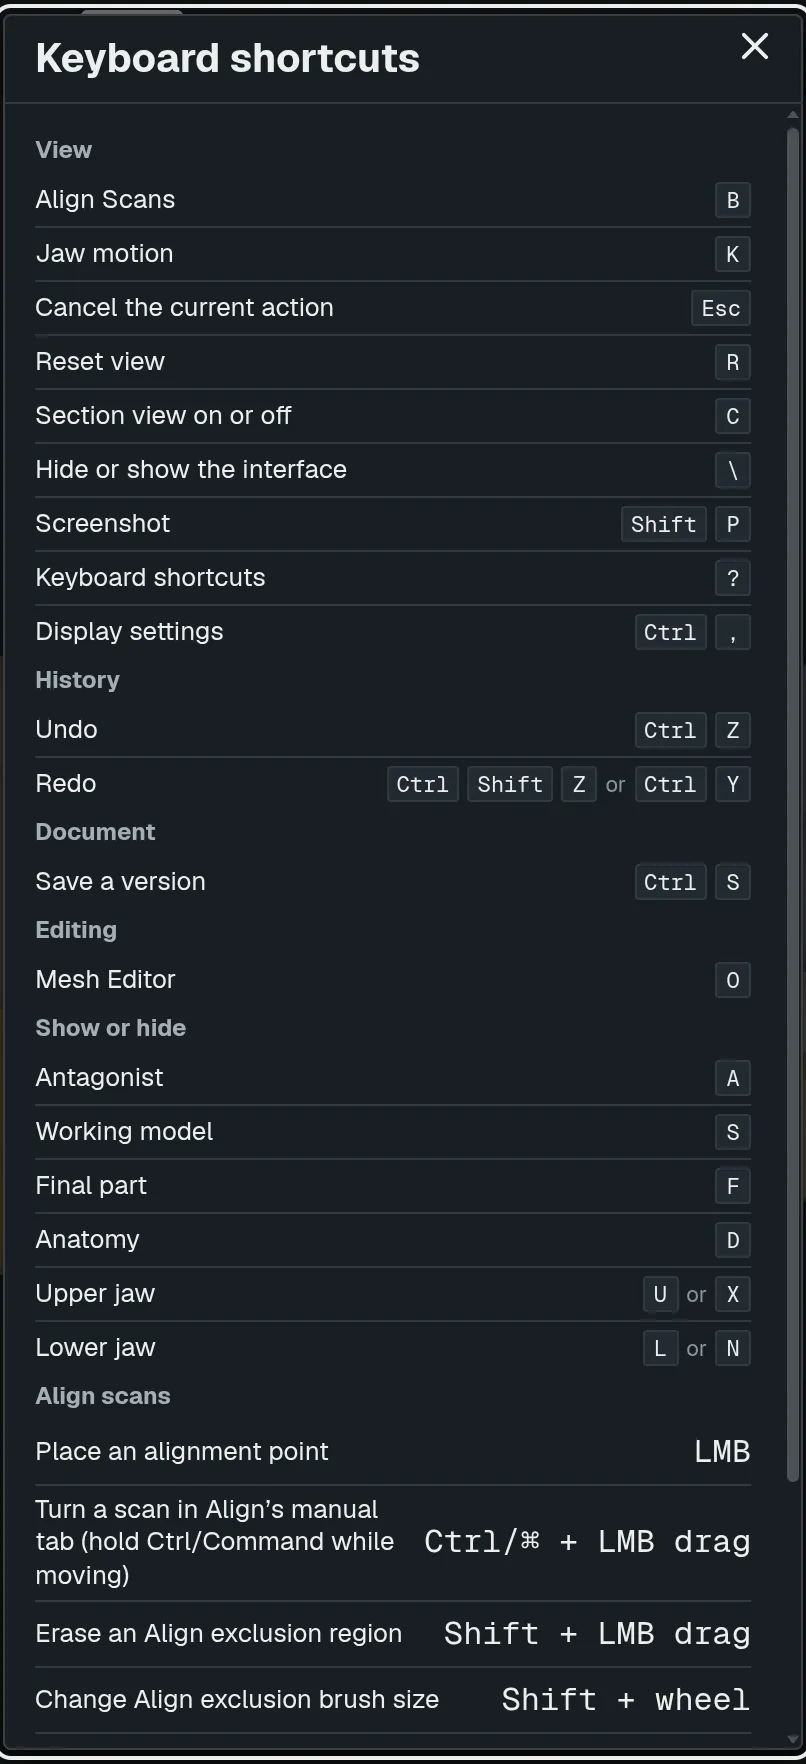
Press ? for the keys of the screen and Ctrl + , for the 3D view settings.
ABC
1
Press ? on the keyboard.
Keyboard shortcutsA lists the keys of this screen.
2
Press R for Reset viewB when the jaw is off screen.
3
Press Ctrl + , for Display settingsC.
DEFGHI
The 3D view window opens.
4
Change what you need.
5
Press Done.
Tip
The gear button in the top bar opens the same 3D view window.
The 3D view settings apply to every case on your account.
More
Draw also redraws the whole line: draw once all the way round the tooth.
This Undo only takes back line changes. The top bar Undo covers the whole case.
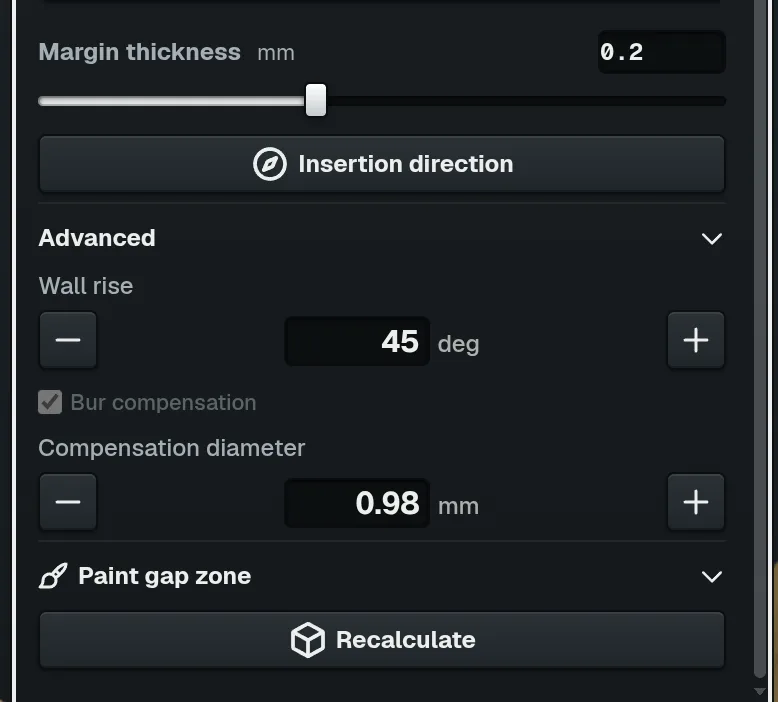
RecalculateF builds the inner surface again. On a made crown it asks first: Rebuild or Keep crown.
A grey Bur compensation box means the case's order sets it. Change it in the order's preset.
More
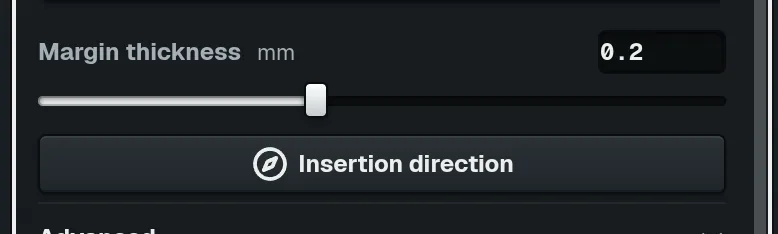
Margin thickness: 0.2 mm by default, 0 to 0.5 mm, never more than Minimum thickness. The crown's neck moves out with it; a knife edge chips in milling and sintering.
Wall rise: 45 degrees by default, 30 to 60 degrees in steps of 5.
Bur compensation is on for milled materials (zirconia, lithium disilicate, resin ceramic, PMMA) and off for printed resin. Compensation diameter works only while it is on.
Compensation diameter is your bur's diameter times 1.2. For zirconia it is also divided by the blank's enlargement (1.23), because the blank is milled larger than the crown.
Default Compensation diameter: zirconia 0.98 mm (1.0 mm bur), lithium disilicate 1.32 mm (1.1 mm bur), resin ceramic and PMMA 1.2 mm (1.0 mm bur). Range 0.3 to 3.0 mm.
Caution
A wall thinner than the material minimum can break in the mouth.
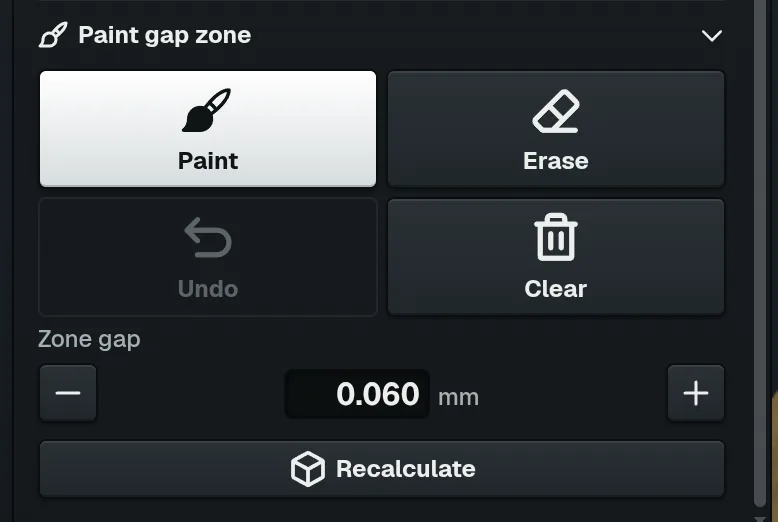
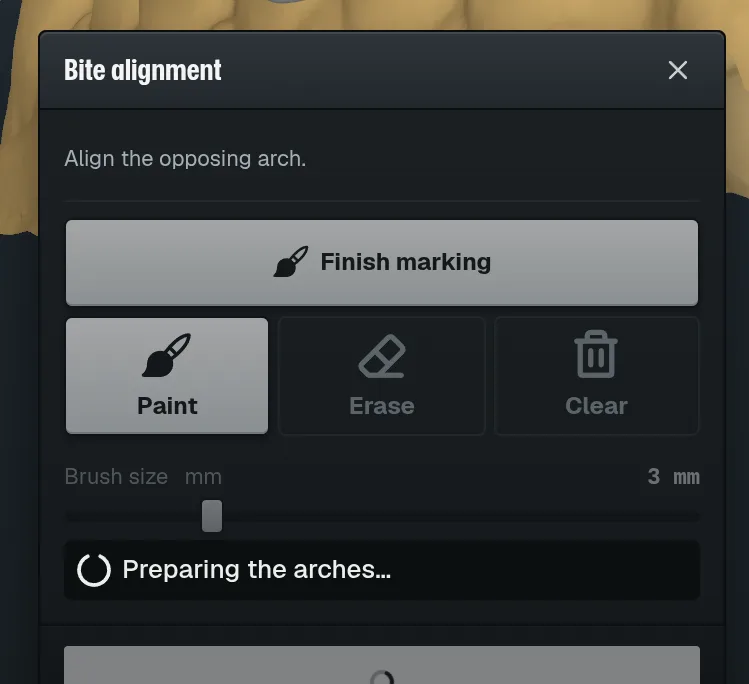
EraseF removes paint, UndoG the last stroke, ClearH the whole area.
Show tooth in the Crown window brings the crown back.
More
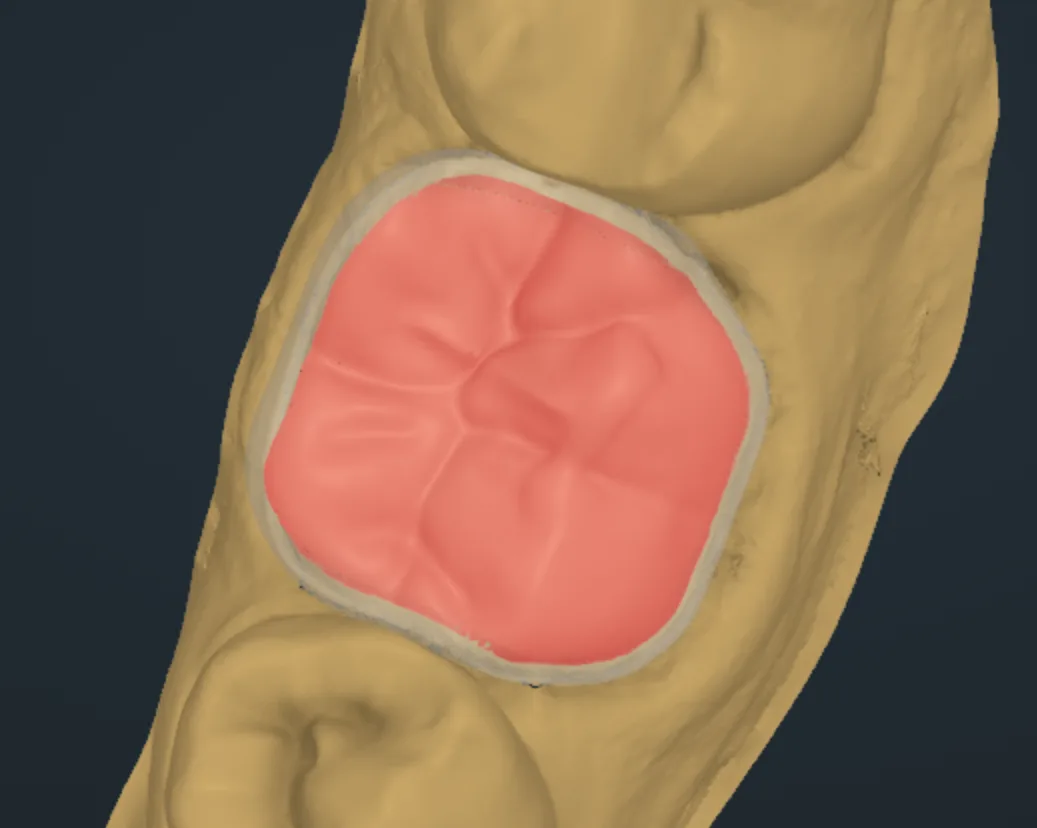
Zone gap starts at the Cement gap, so paint alone adds no room. Raise Zone gap to open the area.
Zone gap: 0 to 0.3 mm in steps of 0.01 mm. A production order can narrow it.
Hold Shift while painting to erase. The brush has a fixed size.
An area painted before the scan was edited is left out of the build. Press Clear and paint it again.
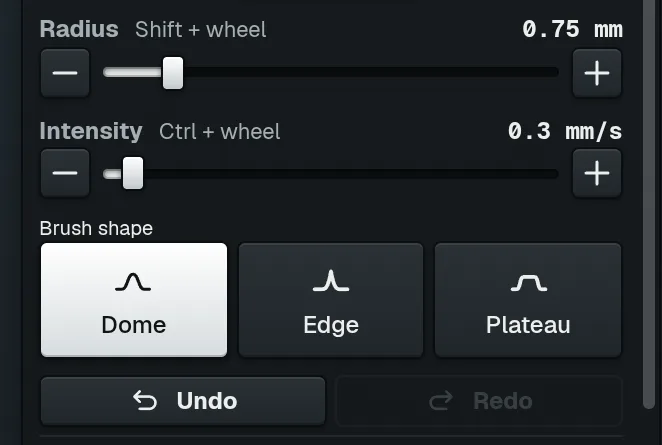
Radius
: 0.25 to 4 mm with
Dome
, up to 2.5 mm with
Edge
, up to 2 mm with
Plateau
.
Intensity with Add: 0.1 to 5 mm/s, default 0.3 mm/s.
Intensity with Smooth: 2 to 100 %, default 30 %.
The − and + buttons beside each slider change it one step.
Choose Proposed.
7
Press Apply bite.
The opposing arch sits in the new bite.
Tip
The notice closes by itself after a few seconds; the Bite button works any time.
Switch the check on or off in Settings: Check the bite when a case opens.
Caution
When both arches already carry work, the moved arch needs its margin lines, and any crowns, made again.
D
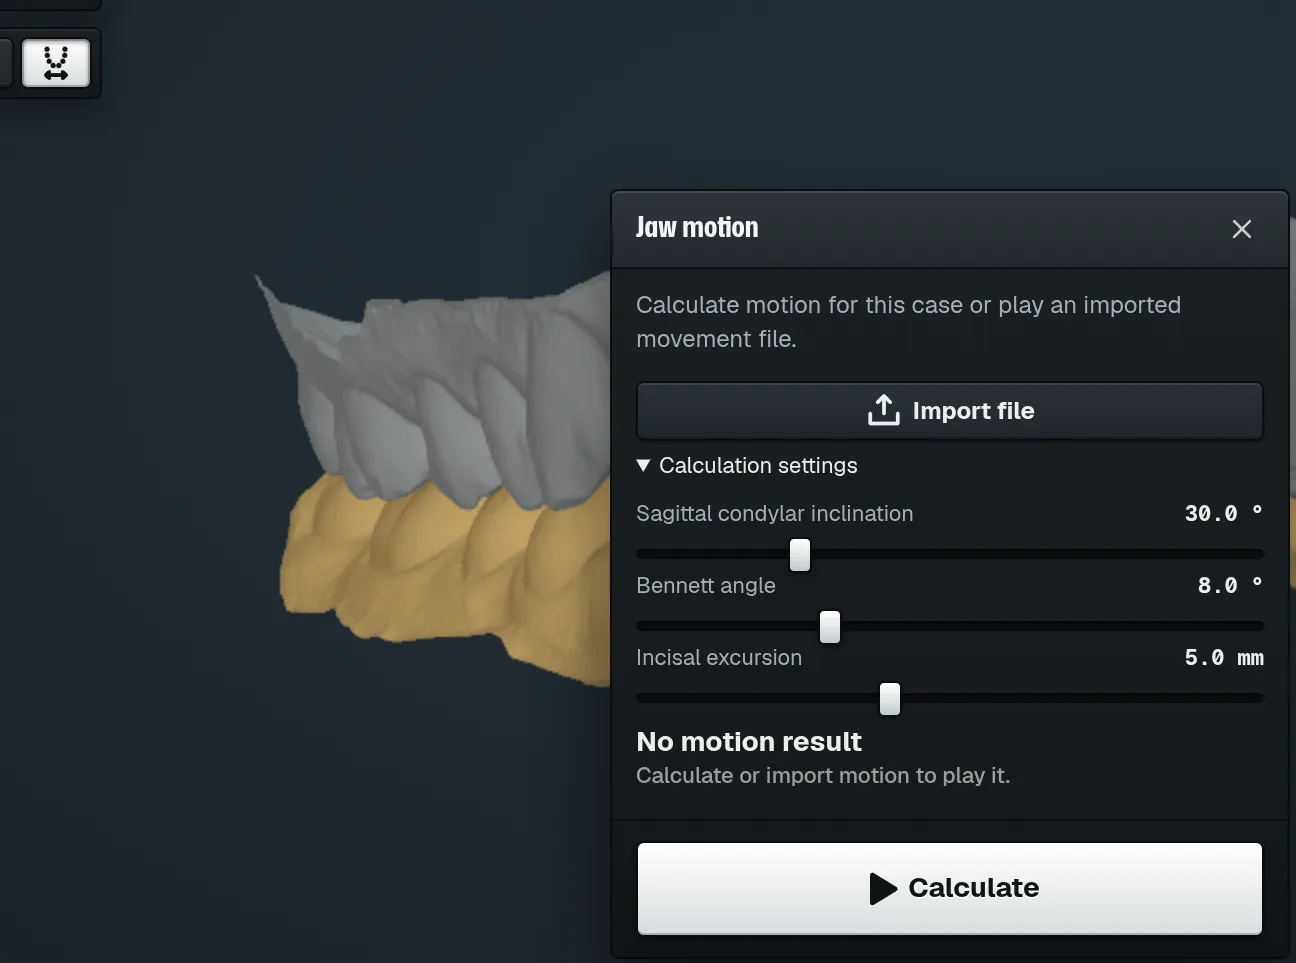
: how far the joint on the far side swings inward in a side movement. Default 8°.
Incisal excursionE: how far the front teeth travel in each movement. Default 5 mm.
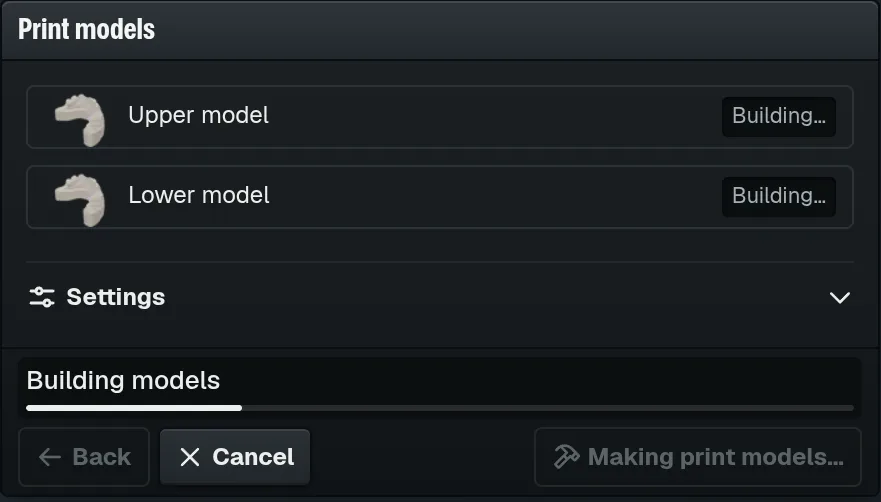
The models are saved to the case.
Tip
The same window opens from Make models in the Export sheet and from Project → Print models.
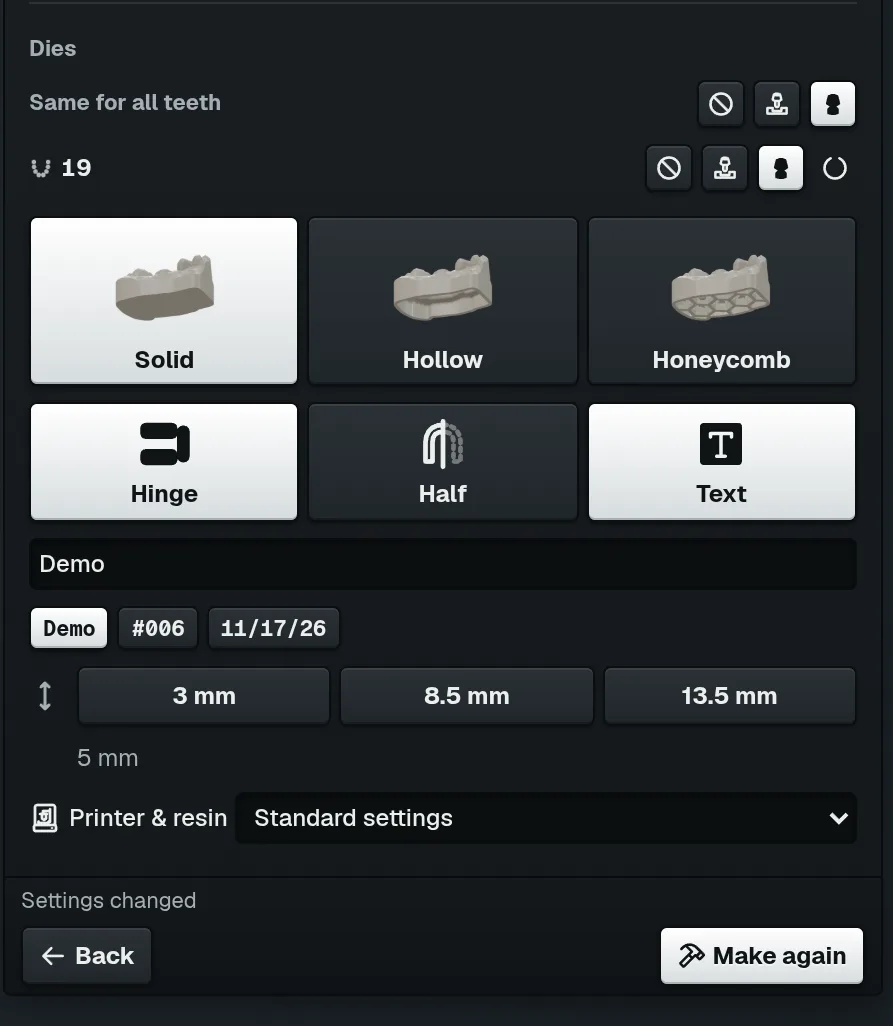
Hinge joins both models with a printed hinge: next lesson.
More
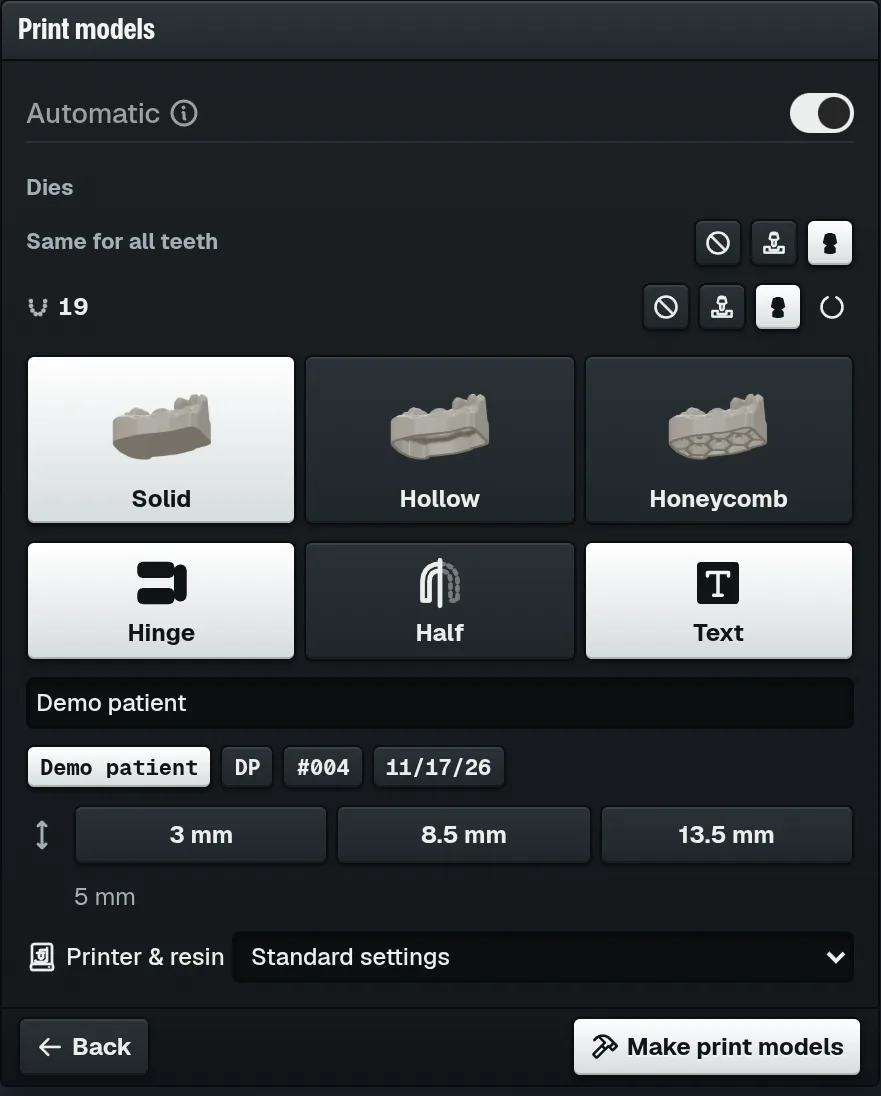
No die: the arch models alone. Removable die: a sectioned arch; the die lifts out of its socket. Loose die: a solid arch for the contacts, plus a loose die with its margin clear.
Same for all teeth sets every tooth at once. Your last choice comes back; a first case starts with a loose die.
Body: Solid is filled, Hollow is hollow, Honeycomb is hollow and braced inside. It starts Hollow, or Solid once a die is chosen.
Base height C: the base under the gums. 3 mm, or the base that makes the taller model 25 or 30 mm high. The number below is the base now; default 5 mm.
In the scene, each model shows its full height and its base, in mm.
AutomaticF: on, one press makes everything. Off opens the editor, where you set every step by hand.
TextG: the patient's name on the front of both models. Type your own words or press a case chip below it.
HalfH: prints only the working half. The arch is cut on the midline and the other half is dropped.
Printer & resinI: the settings for your printer. Standard settings until you pick one.
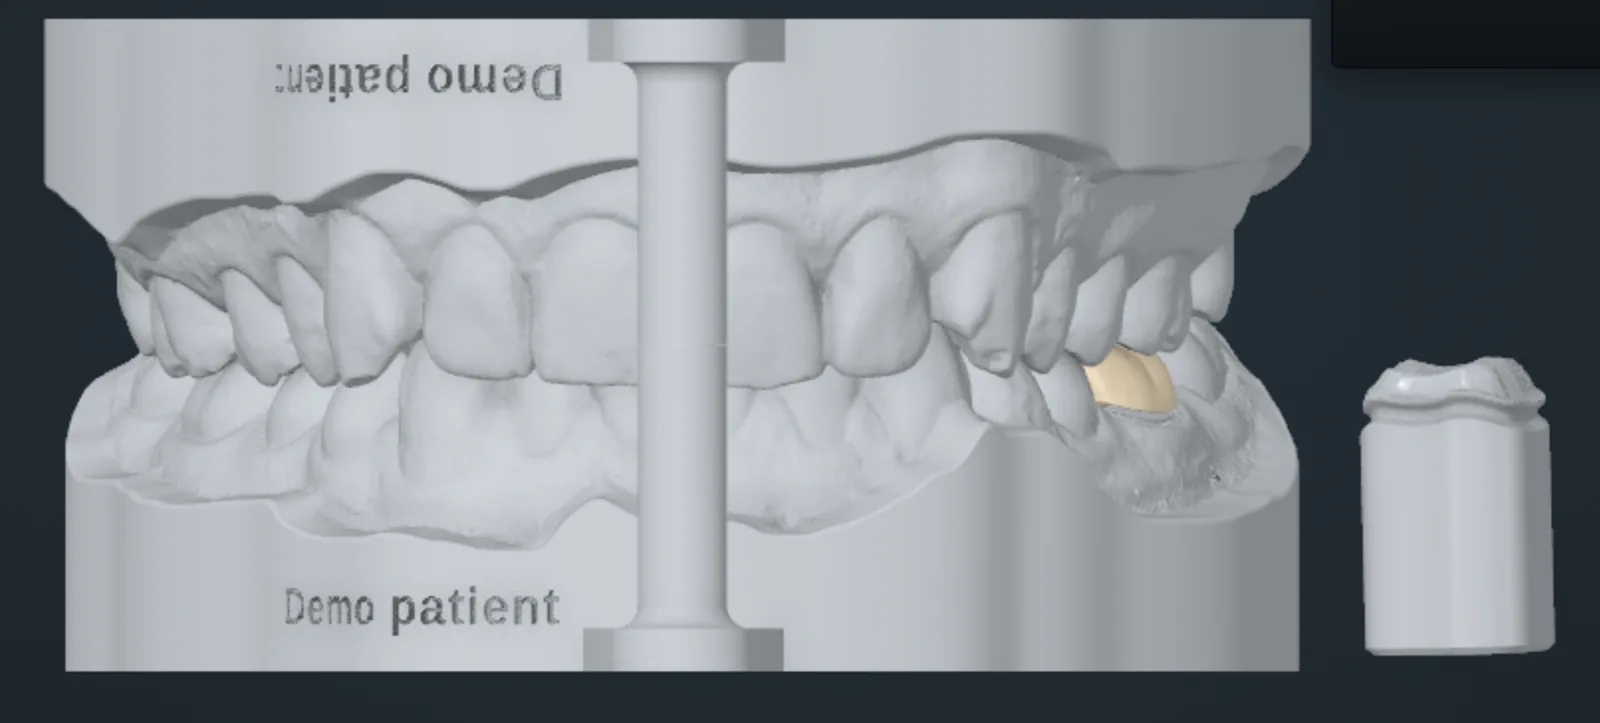
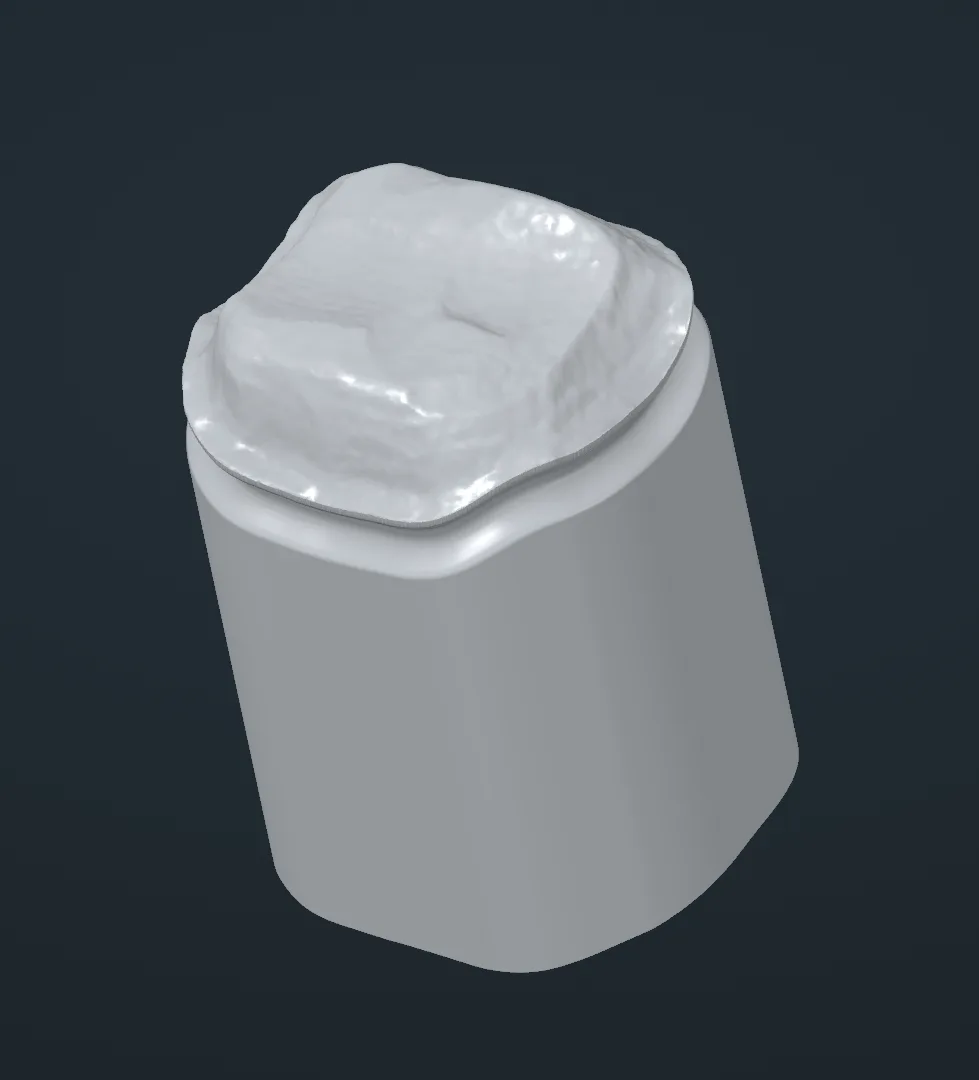
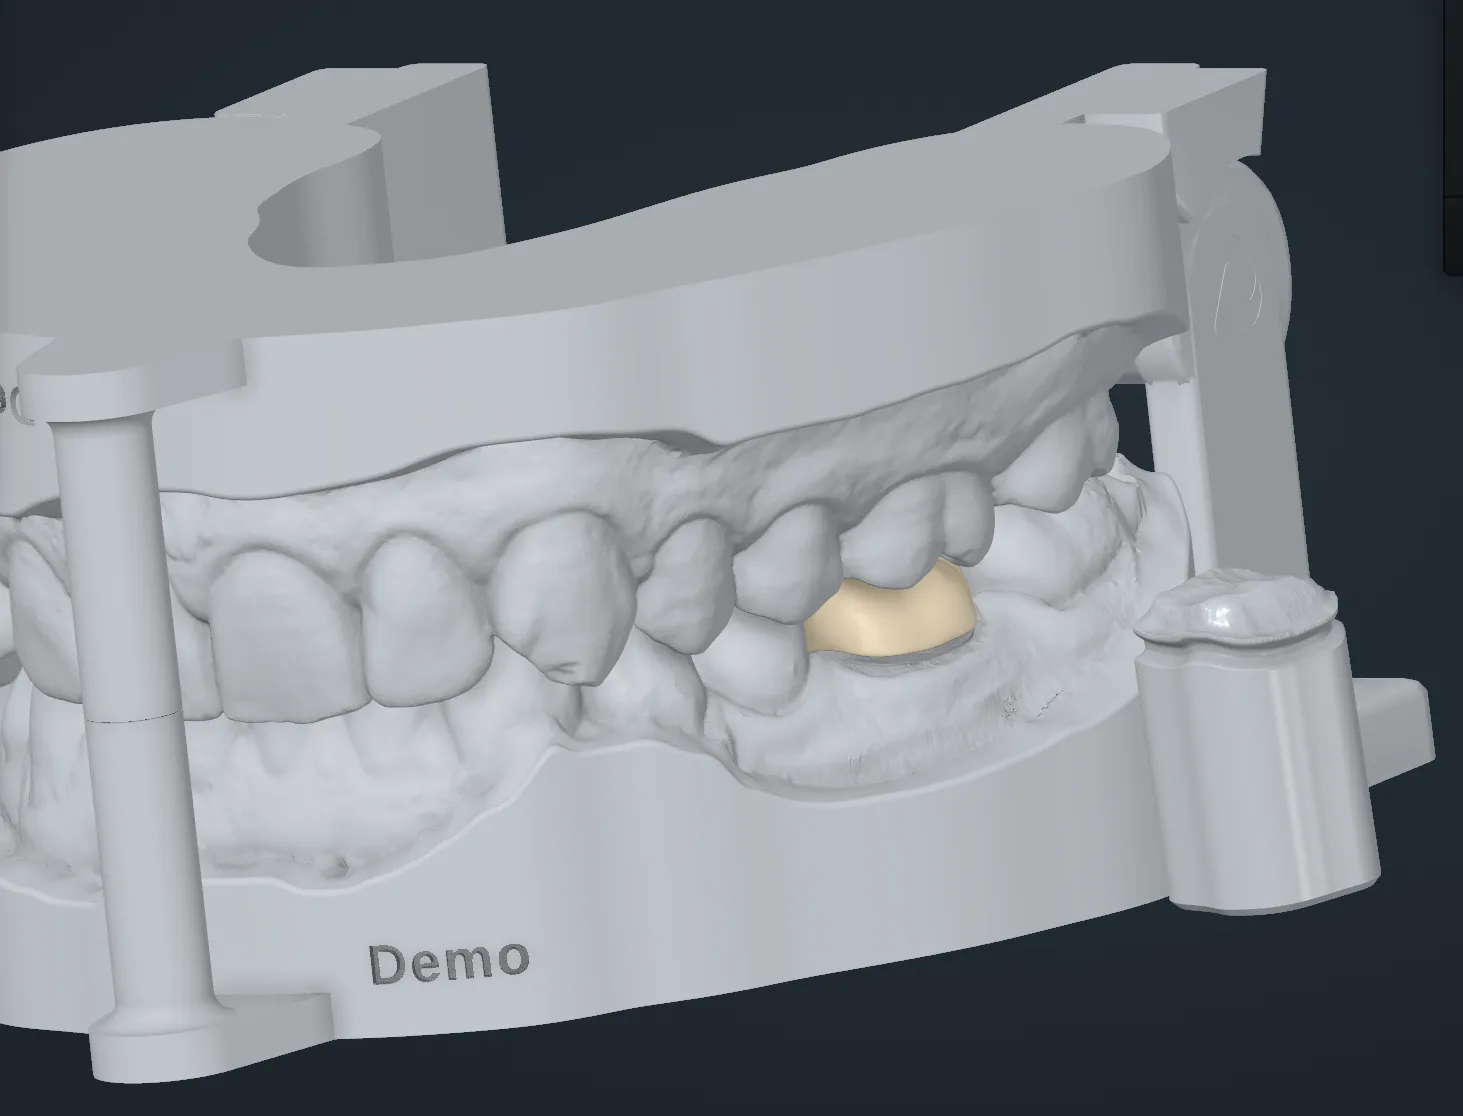
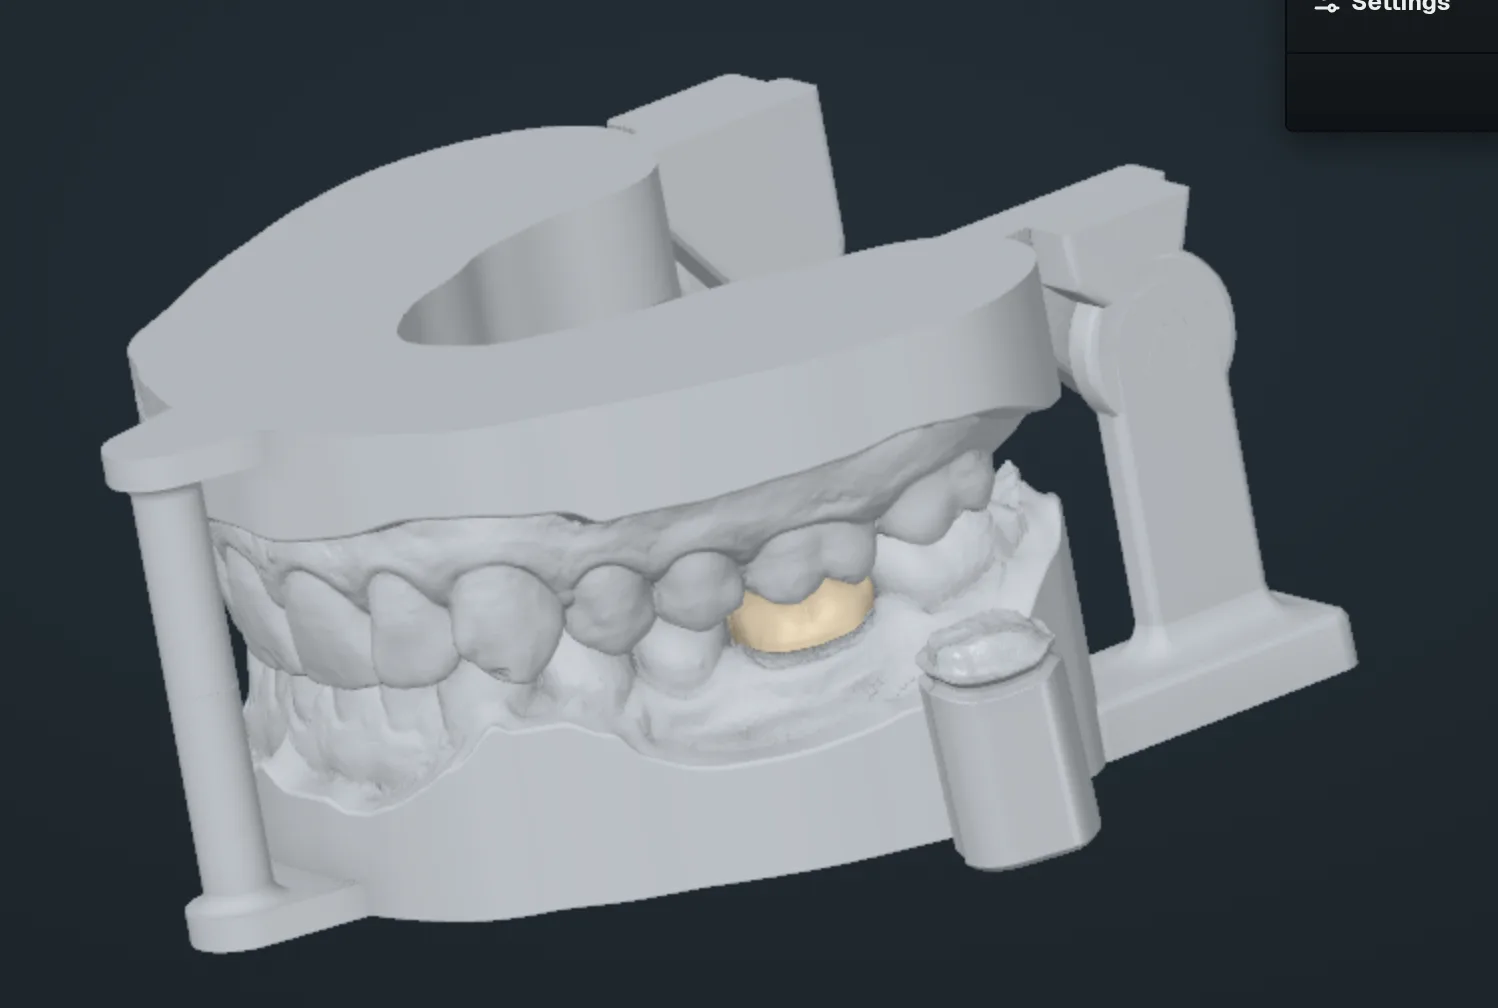
The crown sits on the solid arch; the die is the prepared tooth on a shaft.
6
Press Done.
The models and the die are saved to the case.
Tip
Models made before? The button reads Make again.
To see the die alone, hide Upper model and Lower model in Layers.
More
Loose die: a solid arch for the contacts, plus a separate die with its margin clear. Fit the crown margin on the die, then check contacts on the arch.
Removable die: the die is cut out of the arch and lifts out of its socket.
With several crowns, set each tooth on its own line, or use Same for all teeth.
.
Back to automatic puts it back where the app placed it.
Automatic
as
Before start over
.
More
Your versions: the versions you saved. Automatic: points the app writes when a step is completed, and before a restore or a start over.
What you had before a restore is kept as Before restore under Automatic, so a restore can be undone.
Press DeleteH to remove them, or CropI to keep only them.
After Delete, the marked part is gone.
6
Press ApplyJ to keep the edit, or CancelK to drop it.
Draw a Lasso around the gum, then press Delete.
Tip
Ctrl + Z inside the editor brings back the last deleted or cropped part.
The Delete key removes the marked faces too.
More
Lasso: draw and release, or click points and press Enter.
Rectangle: drag a box around the area.
Object: click a separate part to mark all of it.
Through is on when the editor opens. It also marks the back of the scan behind the area.
Hold Shift while you mark to unmark faces. Clear unmarks everything.
More tools: Cut moves the marked faces into a new layer, Separate splits them into one mesh per part, Invert swaps marked and unmarked faces.
Right-click empty space and choose Edit mesh (all scans)…, or press O, to edit every scan at once.
A hole closes only where the faces around it are marked.
The open outer edge of the scan always stays open.
More
Limit hole sizeE: off by default, so every safe hole inside the marked area is filled.
Tick it to fill only holes whose rim is at most as long as the number F. Default 15 mm, from 1 to 100 mm.
Repair welds duplicate points, drops loose fragments, splits faulty corners and closes pinholes on the whole scan.
The scan is back as it was when you opened Sculpt.
Tip
Esc works like Cancel.
Caution
Sculpting the working scan changes the surface the crown is fitted to.
More
Only the working scan and the opposing scan can be sculpted.
Radius, Intensity and brush shape work as on the crown. Default 0.75 mm and 0.3 mm/s.
Pull is not offered on a scan.
Measure distanceD measures between two points you click on the cut.
Press Esc to pick the cut up again and move it.
G flips which side of the cut is kept.
More
Reset zoomF brings the cut back to its first framing after you zoom inside the window.
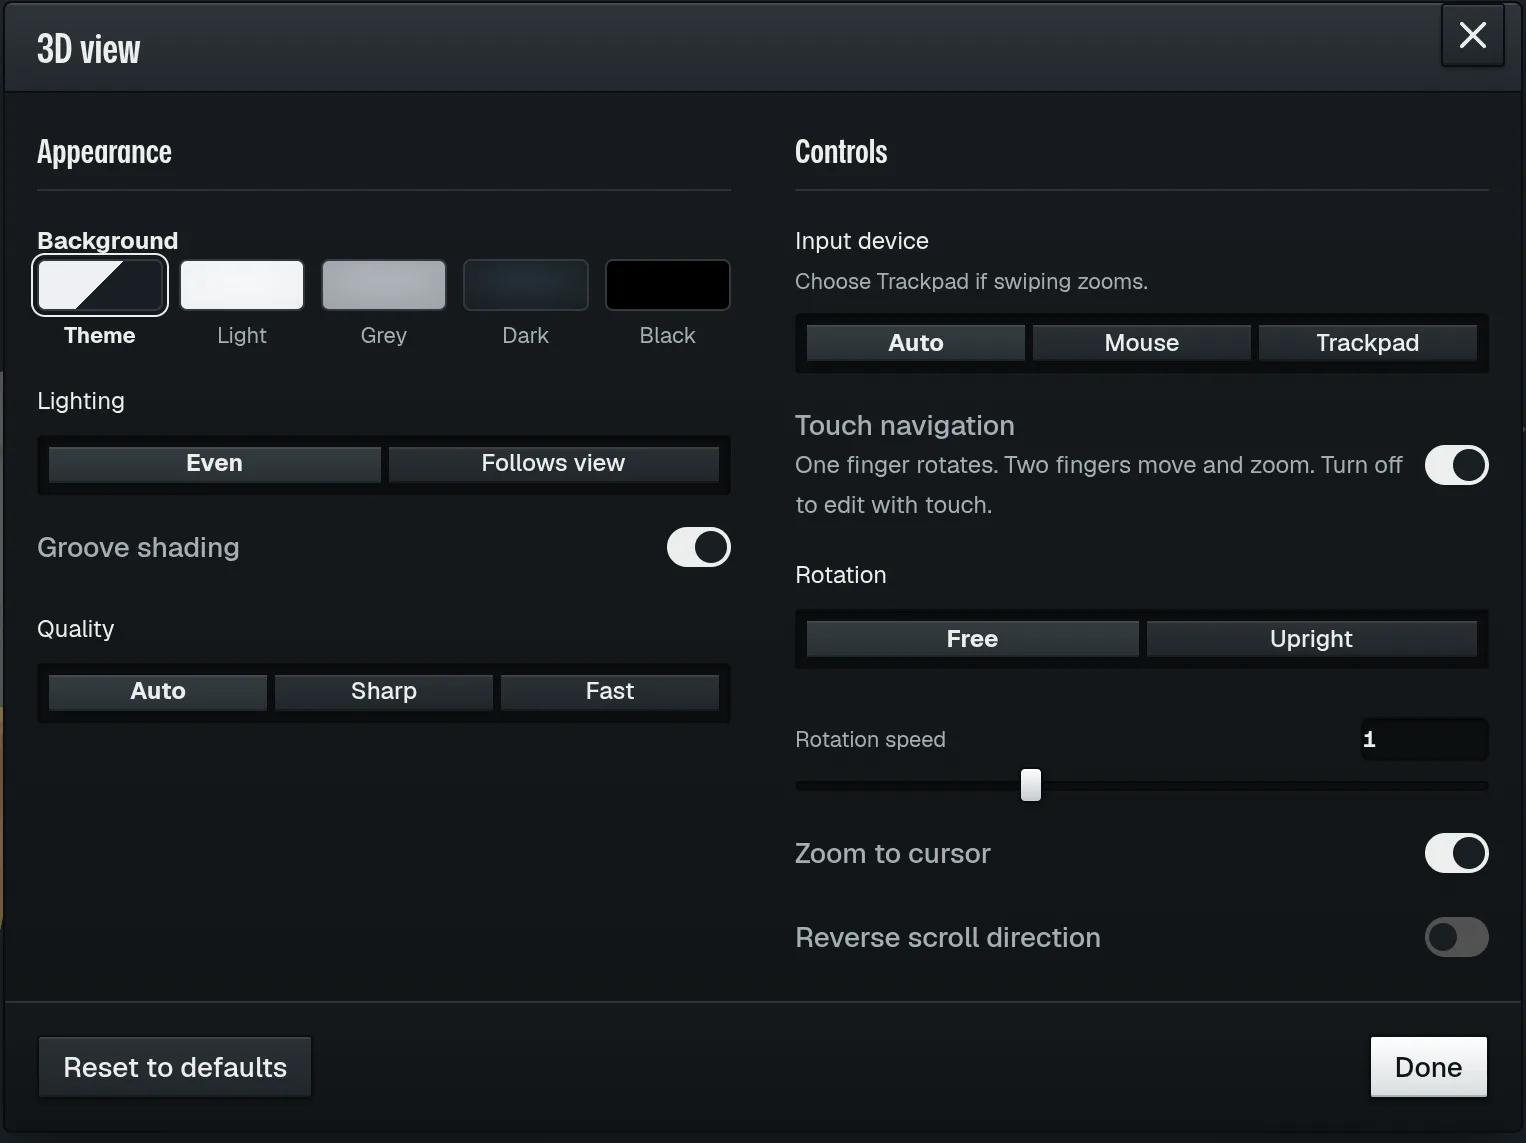
Background
D
: the colour behind the model. Default
Theme
, which follows the light or dark look of the app.
LightingE: Even lights the model from all sides, Follows view lights it from where you look. Default Even.
Groove shading: darkens grooves and fissures. On by default; needs Auto or Sharp quality.
QualityF: Sharp draws finer, Fast draws quicker. Default Auto.
RotationG: Free turns the model any way, Upright keeps it standing upright. Default Free.
Zoom to cursorH: the wheel zooms toward the pointer. On by default.
Input device: choose Trackpad if swiping zooms. Default Auto.